Sunday, 27 November 2016

Alice in Wonderland

I always think a special person deserves an equally special card on the occasion of their birthday, so with this in mind, I made a Never-Ending card.

I haven't made one for a while, and it got me thinking about what images to use
as each of the panels aren't particularly big.  

I had decided I wanted to go with an "Alice in Wonderland" theme
and I found some digi stamps at Vera Lane Studio
that way I could resize the images for a perfect fit.
I also used stamps from other sources that fitted in with the theme.

Card front

After resizing the images I printed them onto cardstock and began the task of working out which image would go on which panel.  

First flip

For those of you who know how a never-ending card works, 
you will understand my 'first flip' caption.

Second flip

The images on the tiny panels are not digi but from various stamps.

Back of card

The top panel has been left blank for a birthday message to be written.

Stamps
Vera Lane Studio - 'Alice & Rabbit'
Vera Lane Studio - Quirky Queen of Hearts
Vera Lane Studio - 'Mad Hatter'
Stampendous - 'Birthday Wishes'
Stampendous - 'Whisper Friends'
Dylusions - 'Clearly Borders'
Stampotique - 'Catepillar'
Obsession Expression - B11030C
Lavinia Stamps - 'Hanging Lanterns'
Prima - Creating in Faith #980702
Visible Image - 'Cheshire Cat'

Gosh, I didn't realise how many different stamp companies contributed to the making of this card.  If you wish to know where a specific image comes from, please leave a message and I'll try to get back to you.

Happy Birthday, Gorgeous Girl!

Happy Crafting!

Friday, 25 November 2016

Cinderella

This week's theme at Wicked Wednesday is
"Cinderella"
sponsored by Concetta Kilmer


She is coloured with a combination of Prismacolor and metallic pencils.
I fussy cut around the image, found a snippet of background paper and popped her onto dimensionals.  A quick doodle around the border and she is ready to go to the Ball!

If you would like to see more Concetta Kilmer designs, please click on the above link.

Happy Crafting!
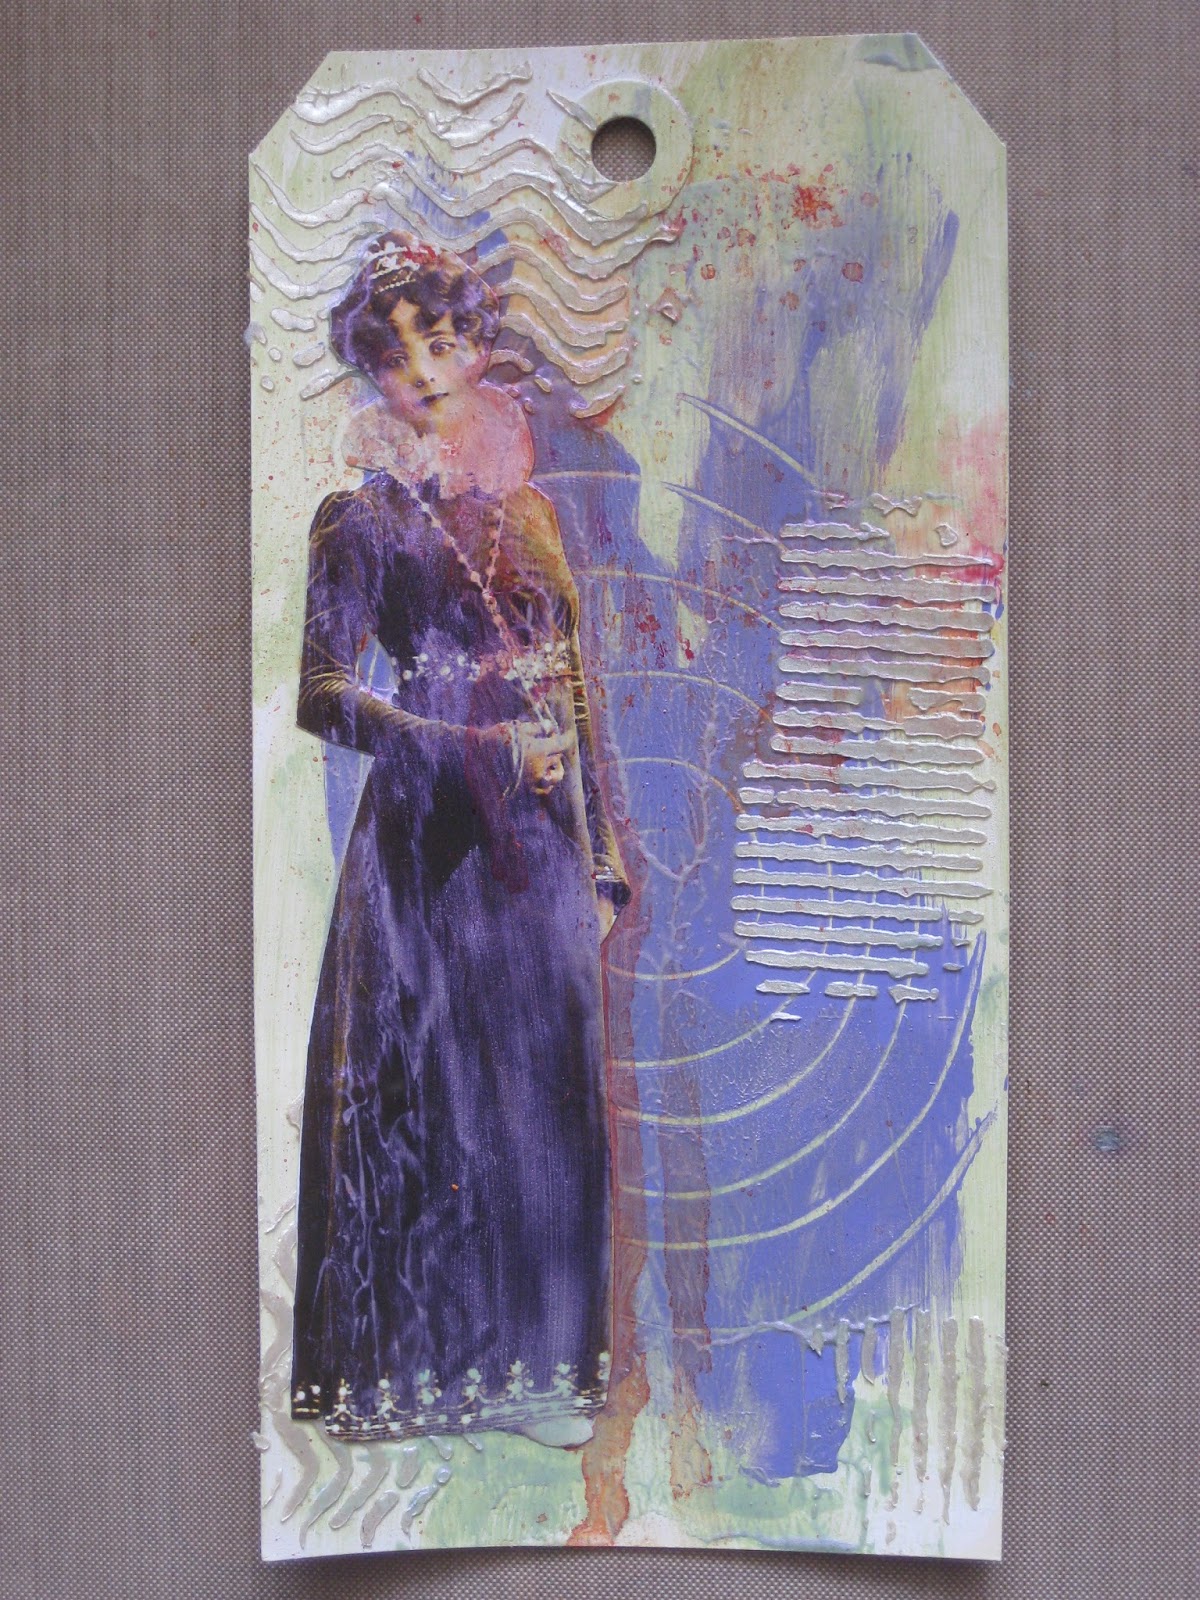
Journey's end - Weeks 10-12

If you have been following the Build-a-Tag journey,
you will be happy to know that by the time you scroll to the bottom,
it will have come to an end.
(Phew!  What a relief!  [I hear you say] )

Week 10

Cut out and adhere a main focal image to your tag.
This can be drawn, stamped, collaged, downloaded or cut from a book/magazine.


I'm not sure that these images are my main focal point,
however, they are in the foreground.

Tag 1 - mushrooms

Tag 2 - hare

Week 11

Add doodles, marks and/or embellishments


The mushrooms and hare were outlined using a white sharpie pen.

Tag 1

There are more white dots doodled on the lady's necklace and in the spokes of the stencilled layer.

Tag 2

Oops!  I obviously forgot to take a photo of the extra doodles, but you'll see them in Week 12.

Week 12

Find a word in a book or magazine to attach to your image.


The tags are now finished, complete with words.

Tag 1

I came across 'ghostly greetings' and thought it very appropriate 
as the lady certainly has a ghost-like appearance.

Tag 2

Perhaps this girl is a 'dreamer' as the hare dashes across her path.

So, there you have it - 12 weeks of Build-a-Tag finished.
What do you think?
It was a bit out of my comfort zone as I usually do more clean & simple,
but I'm really happy with the completed tags.
Hopefully, it will give me more confidence in my creative journey.

Happy Crafting!


Thursday, 24 November 2016

Fast tracking weeks 7-9

The fast-tracked journey is almost over, so bare with me just a little longer.

Week 7

Add more stencilled layers


To add more texture to the tags, I used Ferro "Graphite" by Viva.  
This is a gritty paste and once dried it has quite a rough feel.

Tag 1

As there was plenty of space on this tag, I was happy to use a slightly bigger stencil.

Tag 2

The butterflies seemed a perfect fit for this tag.

Week 8

Use clear gesso to completely cover your tag


The clear gesso leaves a rough feel on the tags.

Week 9

Stamp one or more images across your tag 


I didn't want to cover too much so used a narrow border stamp, 
which also grounds both girls.

Tag 1

Tag 2

What do you think so far?

Please feel free to leave a comment and come back again tomorrow
for the final installment of the "Build-a-Tag" journey.

Happy Crafting!

Wednesday, 23 November 2016

Next installment - week 5-6

Welcome back ..... 

Week 5

Add a layer of translucent paint

This step had me a bit stumped.  I liked my tags as they were from Week 4 and wasn't sure about covering them in a layer of paint.  
However, after thinking about it, I decided I'd use some Art Alchemy acrylic paint called 
"Opal Magic Violet-Green"


This paint has a definite purple/violet appearance while still allowing what is underneath to be seen.


It's a bit hard to seen the sheen, but it is certainly there.

Tag 1

Tag 2

..... and now on to the next week.

Week 6

Spray or drip a contrasting colour of paint or ink
across/down the tag


I wasn't too sure about this step as I didn't want to cover over the girls, so after thinking about it, I decided to puff some Ken Oliver Color Burst powder paint in 'Orange' on the top of the tag, spritz it with water and let it run down the tag.

Tag 1

Tag 2

Pop back tomorrow when I'll add weeks 7 - 9.

Happy Crafting!

Tuesday, 22 November 2016

The journey continues - weeks 3 & 4

..... and so the journey continues.

Week 3

Press modelling gel/grunge paste through stencil of choice


For this step, I chose to use Modellier Creme 'Mother of Pearl Champagner' by Viva
as it has a lovely sheen to it as well as adding more interest.

Tag 1

Tag 2

It's starting to look interesting seeing the different layers being added.

Week 4

Add some collage with matte/gloss medium, or your preferred glue.
Add a layer of matte medium over the top the collage pieces.


A while back, I was given some collage sheets but wasn't sure where to use them.
These two girls were the perfect choice for these tags.

Tag 1

Tag 2

I was really pleased with how the tags were coming along, and there is a definite favourite emerging.

I'll be back tomorrow with Weeks 5 & 6, so please come and have a look.

Happy Crafting!

Monday, 21 November 2016

I've been on a journey

I've been on a journey ......
a journey that started with a blank tag 
that has lasted 12 weeks and has now come to an end.

Around the beginning of September, I joined a facebook group, 
which was just about to start a weekly journey called "Build-a-Tag".  
It sounded interesting and I decided I wanted to play along.

I hope you'll join me as I go through each week 
and be inspired to create something which may be outside your comfort zone!

Week 1

Create a tag, any size.  Add one layer of gesso, when dry, add one colour.

Tag 1 - white gesso

Tag 2 - black gesso

As I had no idea where this journey was going, I decided to play with two tags, one gessoed white and one black.  I would use the same colours and follow each step for both.

Tag 1 - add colour

Tag 2 - add colour

I was really not sure where this was heading, but I guess that's sometimes part of the journey.

Week 2

Add a further paint colour to your tag and while it is still wet, draw or write into it with the end of a paintbrush or pencil.

Tag 1 - second colour

Tag 2 - second colour

Until this step, I thought I preferred Tag 1 but now I'm not so sure.

Please come back tomorrow and see where weeks 3 & 4 take me.

Happy Crafting!