Showing posts with label Julie Nutting Stamps. Show all posts

Saturday, 22 September 2018

Witches and Bears


Anyone want to join in the fun?
These little ATC Coins are easy to make and lots of fun.


While I had my cuttlebug out last week, I went through my card leftovers [yes, we ALL have them] 
and cut a pile of 2 1/2" circles from plain card, backgrounds etc, ready to make ATC Coins.


In this instance, the backgrounds had been done previously and put aside, 
so all I had to do was decorate each one.


If you haven't already guessed, it was a Halloween themed swap.


I chose three images from different stamp companies, stamped them onto white card, 
then coloured and fussy cut them out.  
They were then glued onto the coins, which were then edged with "wilted violet" Distress Ink.

The back of each coin is labelled with the date, theme and artist, 
packaged up and sent to my swap partner.


Stamps
Julie Nutting - Witchy Poo
Art Impressions - Air Hag Set
Stampotique - Teddy

  I appreciate your looking, thank you!

Happy Crafting!
  

Monday, 13 November 2017

Naughty or Nice?

I was rather chuffed to see my 'Merry' tag in print,
however, a couple of other submissions didn't make the grade.
Nevertheless I was very happy with how they turned out ....


This gorgeous Santa's helper thought she'd dress up in a non-traditional colour
- naughty or nice?  Hehehehe!!!!
 
I found some nice background paper, and added a co-ordinating mat, which was adhered to folded white card.   I stamped, coloured and fussy cut her, adding some glitter washi tape for her to stand on as well as a small snippet in the top corner for balance.

This card is fairly simple in design, but I like it.
Perhaps I'm biased?  Hehehehe!!!
 
Stamps
Julie Nutting (Prima) - Merry Nice
 
I'll be back tomorrow with the other card (that didn't make it)!
 
Happy Crafting!


Monday, 17 July 2017

A Bit of Bling!

Bling!  
I don't usually do very much bling, but in this instance,
it was perfect on an 18th card for a lovely young lady.


The colour suggestion was silver/aqua, so with a bit of shopping at my local papercraft store,
I came home with silver card, a 12"x12" sheet of glitter card, a sheet of an embossed shimmer card
along with a sheet of "Mist" from Kaisercraft's Lilac Whisper collection.

The Prima doll was stamped and embossed three times : firstly on white cardstock, again on the embossed shimmer card and lastly on the mist paper.  She was then coloured [skin/hair] and each was fussy cut, then glued into place.  Some diamontes finished off the dress.

Two strips of silver card were added for grounding, she was popped onto dimensionals and the 18 was adhered.


An appropriate quote and birthday greeting were added to the insert.

Stamps
Julie Nutting - Prima Doll
Stampotique - Quote #1

Stampin' Up! Thinlit - Happy Birthday

This card was a little different to my usual as it was a A4 sheet folded in half.
Usually my cards are A5 folded in half, however, I was very happy with the result.

I hear the birthday girl had a lovely 18th celebration!

  Happy Crafting!
 

Wednesday, 19 August 2015

Rapunzel

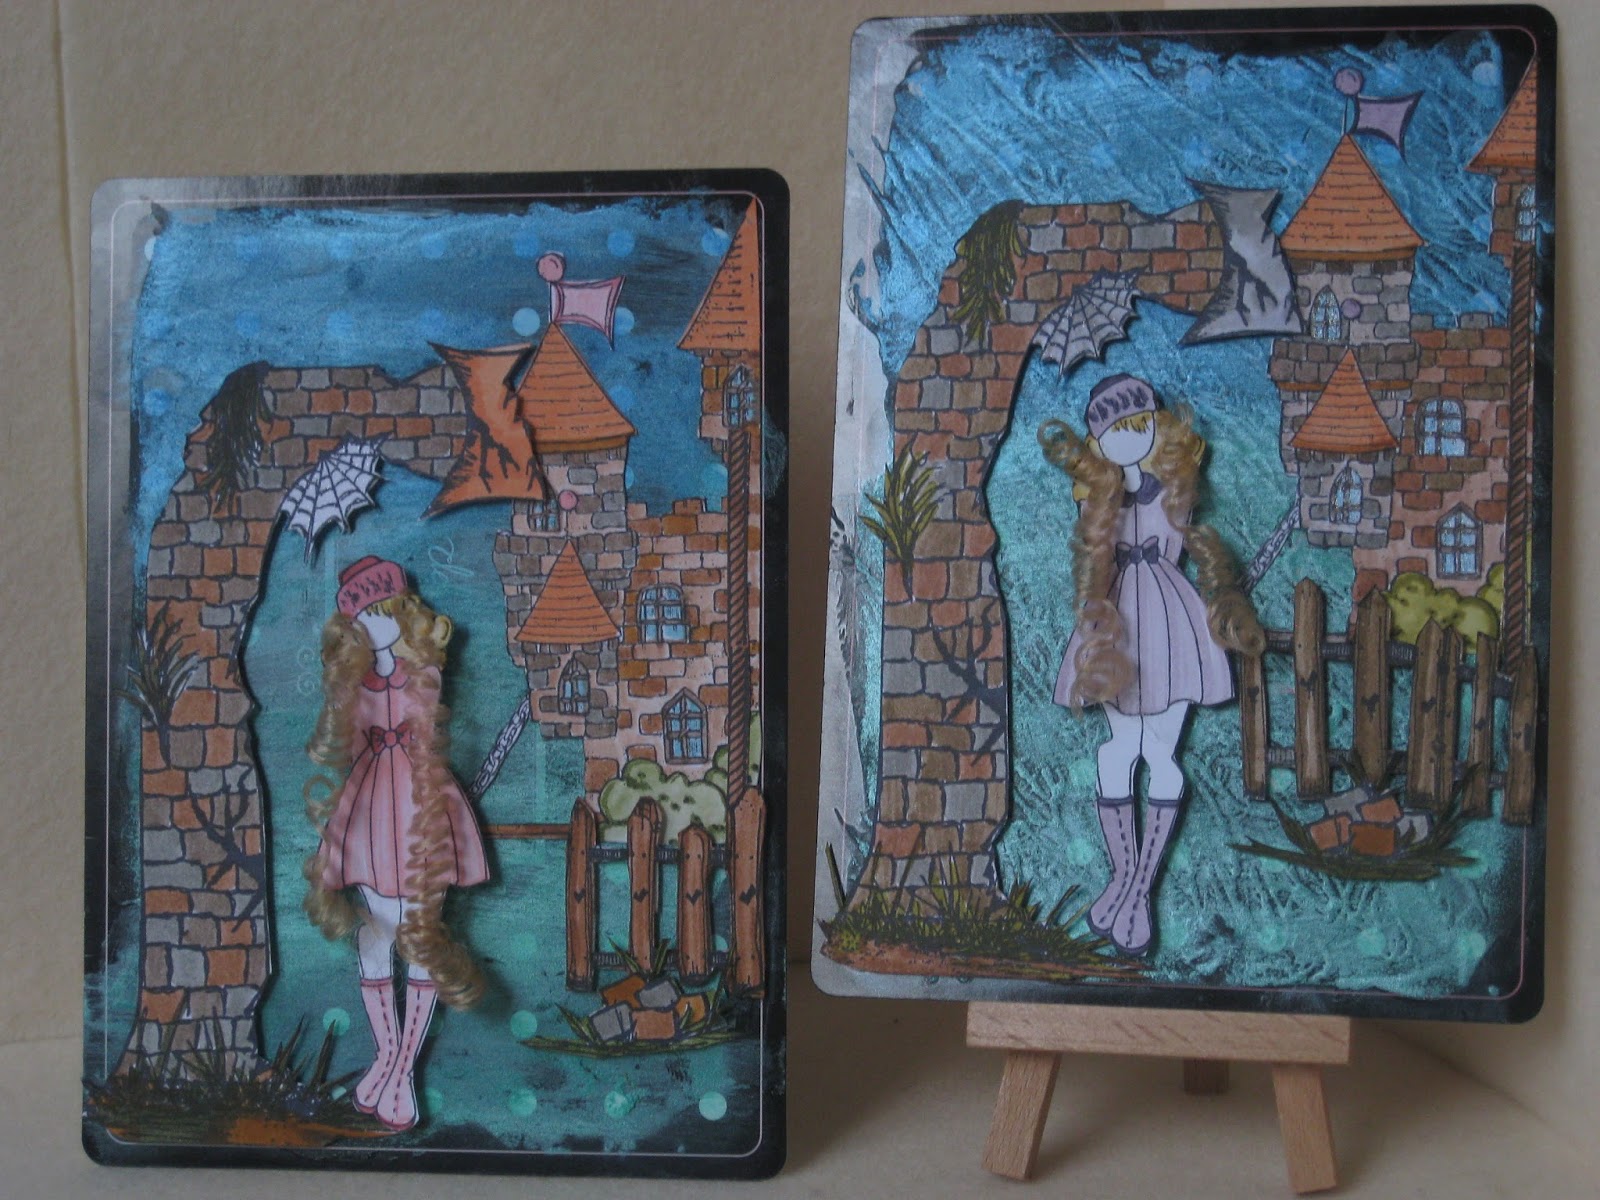
As you may (or may not) know, I enjoy joining in on a couple of international swaps, with a different theme each month.  This month's swap was an 'altered playing card with a fairytale theme' so after a bit of thinking and inspiration from others being posted, this is what I came up with :

Rapunzel

Now, if you are wondering how I fitted so much onto a playing card ...... well, no one said what size the playing card had to be!

I started by covering the back of the card with gesso.  While that was drying I stamped, coloured and cut out all the different pieces that would form the background of my little scene.  A number of different stamps were used for this and these will be listed at the end of this post.

Once the gesso was dry, I used gelatos for the blue and green background.  These add a bit of a shimmer while still allowing a parts of the original card to peep through.

 unaltered side of playing card

 the two cards with slight variations

I'm really not sure what the original purpose of these playing cards would have been, but they were in a container of unwanted goodies that my friend, Jenni, gave me.   On first glance I dismissed them but when this swap was announced using an altered playing card, I gave them a second look - as I said earlier, no one said how big [12.5cm x 18cm] (or small) the playing cards needed to be!

The cards are now winging their way to different parts of the globe, hopefully arriving at their destinations in the not too distant future (fingers crossed Mr Postie).

Playing Card - Heidi Swap
"Edwin's Knight Castle" - Magnolia stamps
"Warm Wishes" - Julie Nutting
"Arch" - Stampotique
"Picket Fence" - Stampotique
"Rope" - Heirloom Ornaments (Spellbinders freebie)

Happy Crafting!

Monday, 8 December 2014

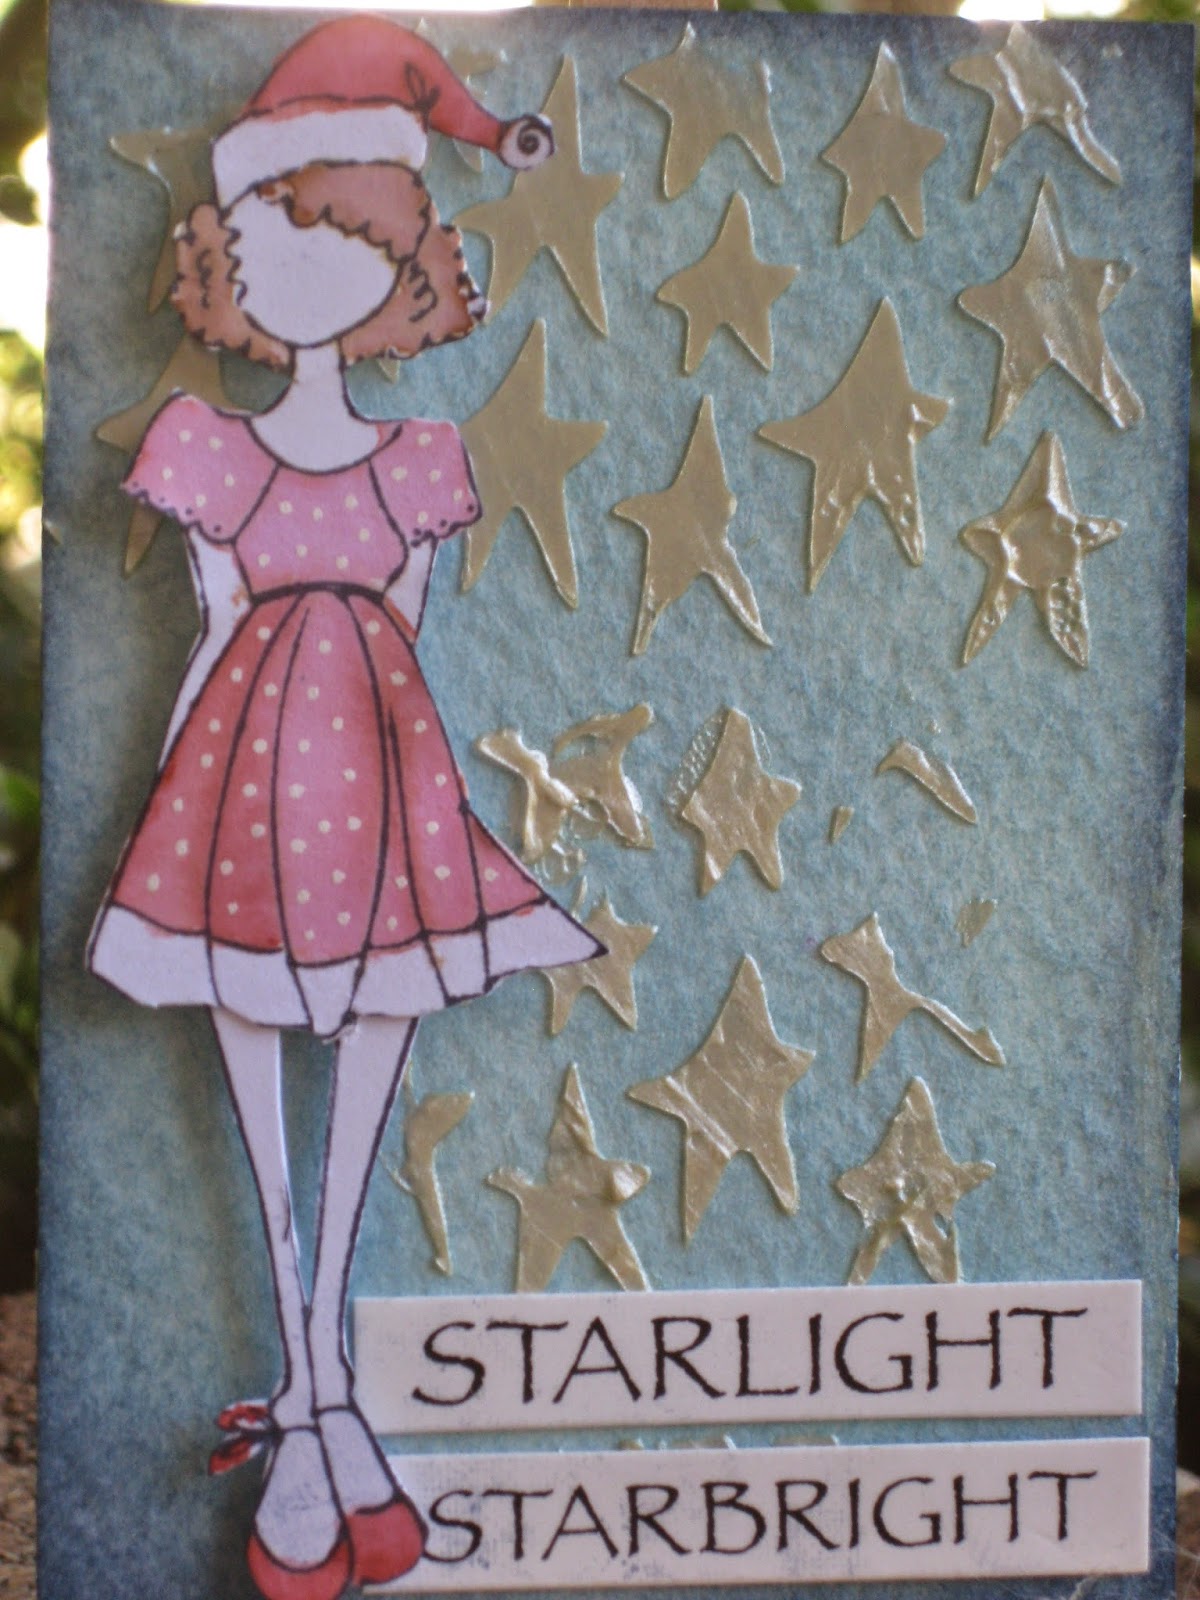
"Clarissa Claus"

It has been SO long since I participated in a challenge, but this afternoon I was determined to have a bit of a play so I could submit something!

So, for starters I decided to begin with the challenge at
whose theme this week is "You're a Star"


I started with a watercolour ATC and coloured it using 'Broken China' Distress Ink.  Next I added Viva Modellier Creme 'Mother of Pearl Champagne' though a Dylusions stencil to add the stars.  I found the words on a Darkroom Door 'wordstrip' which worked with the theme quite nicely.


'Clarissa Claus' (yes, I made that up, hehehe) is from a Julie Nutting set called "Merry Nice", and with ever so slightly shorter legs, fits perfectly on the ATC.  I coloured her with 'Barn Door' Distress Markers, blending the colour with a water brush and adding polka dots with my Posca pen.  Although you can't see it in the photo, the fur on the edge of her Santa hat and also on the edge of her dress is all shimmery, thanks to my new Wink of Stella pen (ooh, why haven't a bought one of these earlier?).
 
Before I popped 'Clarissa' on dimensionals, I went around the edge with 'Faded Jeans' Distress Ink to add a bit of depth ....... and with the words added, my ATC is finished.
It was really nice to play along with this challenge, so come back tomorrow to see what other challenges I am playing along with this week.
 
Happy Crafting!!!
 

Thursday, 24 July 2014

Have you met Natalie?

When I was packing the bits & pieces to take to Craftanoon last Saturday,
I threw in a couple of my new Prima Doll stamps and some tags
so that if I either ran out of challenges to do, 
or needed a different distraction, then they were it.

I find these Doll stamps such fun and so reminiscent of my childhood days
playing 'paper dolls' and creating stories around them
(that was long before I became the horse-mad teenager).


Let me introduce Natalie who is wearing a gorgeous Japanese inspired dress
with matching jacket and shoes.

Natalie was stamped directly onto the tag (made especially for these stamps)
and then stamped again onto a leftover piece of Japanese paper
which was then fussy cut.
I colour matched her jacket and shoes by rubbing Distress Ink 'barn door'
over a piece of white cardstock until it was well inked.  Once it had dried I then stamped the jacket, sash and shoes with Archival 'jet black' and again let the ink dry completely.
They were then fussy cut and paper pieced into place.
Natalie's hair was coloured using water colour pencils.


Next I inked up a Darkroom Door texture stamp "Floral" with 'jet black' and rolled it in random spots on the tag.  The 'happy birthday' and 'borders' came from JOFY collection 11 & 14 which I borrowed from my friend who was also at Craftanoon.  To finish off the tag, I cut small pieces of Japanese paper and stapled them into place.

I have a couple more of these Doll stamps that I have yet to ink up, so perhaps that may happen this coming weekend ....... maybe?

Happy Crafting!

Monday, 2 June 2014

Winter Fairy

this week, the theme is
Fairy Wonderland - #138

As I live in an all male household, I don't think I have ever owned
any fairy stamps, so I got to thinking about the stamps I own
and knowing that I have a couple of set of wing stamps, I set to work.


This lovely girl comes from "Warm Wishes" by Julie Nutting,
and her wings come from a freebie 
that was on the front of a Craft Stamper magazine a while back.

I started by lightly blending 'chipped sapphire' Distress Ink
over the ATC.  Next I stamped the snowflake
(also from the "Warm Wishes" set)
in 'shaded lilac'.

I stamped the girl in 'jet black' Archival Ink
blending 'peacock feathers' onto her dress,
and whatever colour brown
(that happened to remain on the blending sponge)
onto her boots and hair.

Her collar, bow and boot ribbons were coloured with
'victorian velvet' Distress Marker.
Her wings have just a touch of 'weathered wood' Distress Marker
before adding 'baby blue' Stickles for some sparkle.

The mini letters making up Winter Fairy
are from Kaisercraft.

Happy Crafting!!!