Showing posts with label Graphic 45. Show all posts

Thursday, 6 October 2016

Equipped with Air-hag!

Now that it is October, there are lots of halloween challenges happening
including at The Sisterhood of Snarky Stampers
where the new theme is 
'P' is for Pink Halloween


I love the expression on the kitty cat, he looks a little worried!


I picked this stamp up from a craft show a couple of months ago.  
As soon as I saw it, it just tickled my fancy and I had to have her!


The background is paper I cut down to tag size.  I had just about used it all and then discovered it again in a craft shop a week or so back so bought another 4 sheets of it.  It just makes the best backgrounds!

I coloured Air-hag with watercolour pencils which I think looks a little blotchy - oh well!

Stamps
Art Impressions - Air Hag Set #4309
Stampendous - Whisper Friends SSCP103
Graphic 45 - Happy Hauntings

Challenge
Sisterhood of Snarky Stampers - #69 'P' is for Pink Halloween

I think she is 'snarky' enough - don't you?

Happy Crafting!

Tuesday, 13 September 2016

Circus Procession

Following on from yesterday's playtime .....

.... the challenge at Sunday Postcard this week is Circus, 
so I rummaged around in my paper stash and found a lovely background with clowns and acrobats.


I cut this down to 6" x 4" (which is the size of the postcard), adhered it to a piece of cardstock and went around the edges blending 'black soot' Distress Ink.  I had already pre-cut the words and the postage stamp at some earlier stage when I first bought the paper, so they made an easy addition to the postcard.  I simply inked around the edges and glued them in place.

I stamped the banner and Ellie in 'watering can' Archival Ink and fussy cut both.  The banner was coloured with Distress Markers while Ellie was coloured with pencil.  Glitter pens were added on her hat, trunk and toenails.  I popped her on dimensionals but before sticking her in place, I added a piece of washi tape to ground her.  Two extra snippets of tape helped to balance the scene.


Challenge

Stamps
Stampotique - Ellie
Cre8tiv - Border Icons

Paper
Graphic 45 - Le Cirque

Happy Crafting!

Monday, 12 September 2016

Blossoms

I'm on a roll this morning, playing along with various challenges, 
so I'll start with the first one I tackled.

Over at 'Simply Less is More', the theme this week is
'One Layer - Your favourite flower'

I had a look at a couple of different flower stamps and decided I'd go with some blossoms, especially as it is blossom time here as we go into spring.


I decided that ivory cardstock would work very nicely for these flowers as they are quite soft looking.   I coloured the stems and flowers with Distress Markers, did a bit of huffing & puffing and firmly stamped directly onto the cardstock.   Again using a Distress Marker, I added a sentiment.
I felt the card was lacking something, so I drew a border using the fine tip of the Distess Marker, which I feel finishes it off perfectly.

Challenges
Simply Less is More - One Layer 'Your Favourite Flower'
Craft Stamper - Anything Goes

Stamps
Graphic 45 - Birdsong
Stampendous - Life Words SSC1213

Happy Crafting!


Monday, 5 October 2015

Bad Idea

This week's theme at Wicked Wednesday ATC Challenge is 
"Orange & Black"
so with 'spiced marmalade' Distress Ink and a blender sponge, off I went!


After colouring the ATC, I stamped the web and stars ("Happy Hauntings" from Graphic 45) and then stamped "Mr Stripes" from Stampotique at the end of the web.  I stamped him again another two times, coloured, fussy cut and popped his body onto dimensionals.  To give his body a bit more dimension, I went over his stripes with 'majestic purple' and 'onyx pearl' Perfect Pearls, then put him aside to let dry.


Mr Stripes' face was coloured with a purple Gelly Roll pen, the words are from "Barcode Text #2" (Stampotique) and to finish, black Distress Ink was inked on the edges and the ATC was adhered to a black card.
I wasn't sure about the first ATC, so made a second one but in this instance, Mr Stripes is coloured with the Gelly Roll pen.


The background started off with crackle paint (done some weeks ago just to check how well it would crackle) with the 'spiced marmalade' added over the top.


Mr Stripes was also mounted onto black card and to finish him off, I gave him beady eyes with dots of Perfect Pearls.

To see the other entries in this week's challenge, please go to

See you soon ....
Happy Crafting!!!
 

Friday, 10 April 2015

Feeling Abandoned

It's very quiet in my house at the moment, 3 out of 5 family members are travelling overseas, 
which only leaves son #3 and myself at home.  
Not only that, but we no longer have any furry four footed friends either - our little dog passed away at the end of November and sadly our 18 year old kitty cat passed away 2 weeks ago, leaving one goldfish (very hard to cuddle a goldfish).

As I said, very quiet in our house ........ , 
however that leaves lots of time for playing and crafting,
 so this week I decided to use up more scraps to make ATC's to abandon in various locations.


The background papers are leftover pieces from an 8" x 8" "Time to Flourish" collection from Graphic 45.  This was such a lovely collection and included little quotes and other words.


The butterfly and dragonfly are from Prima "Butterfly Wings" and are the perfect size to add to the ATC's.  Although it is hard to see in the photos, they are only attached by their bodies so the wings can lift up.  To give them more sparkle, I have used a Wink of Stella pen on their wings.

I managed to abandon three of these little works of art today, 
one in a cafe where I had lunch with some friends, the second when I visited my mother-in-law in her nursing home and the third in the ladies rest room at my local shopping centre.  Hope they put a smile on the recipient's face, although I'll probably never know!

Tomorrow I'm off to Craftanoon for 12 hours with my friend, so I'd better get packing!

Take care and I'll be back again soon.
 
Happy Crafting!
 

Thursday, 26 March 2015

Cherry Blossom

I'm enjoying a relatively quiet afternoon so once again I decided to play along with some new challenges that have just been posted.
 
At Wicked Wednesday ATC Challenge, the theme is 
Cherry Blossom


The perfect stamp for this is from Graphic 45 "Birdsong" collection.  This was one of my favourite collections and I go back to these stamps over and over.  I inked up the branches and blossoms using brush markers from Artist's Loft in 'vivid pink' and 'brown' and without even huffing, stamped directly onto white cardstock.  The image was better than I expected with a sort of water colour feel to it.  I then inked up the 'happiness' stamp in 'watering can' Archival Ink to compliment the softness of the blossoms.


After trimming the white cardstock down just a wee bit, I attached it to a blue ATC.  The dragonfly is from a Prima set of small stamps called "Stationers Desk", fussy cut and coloured with a blue Gelli Roll pen for some sparkle and popped onto dimensionals.

This little ATC was surprisingly quick to make, I should use the brush marker to stamp technique more often!

Happy Crafting!
 

Wednesday, 18 March 2015

Abandoned but not lonely!

I recently came across a FB page called Art Abandonment
where people make all sorts of different crafty/arty items and leave them somewhere for someone to find.  I was rather intrigued by this and thought about how I could abandon something.  As I have lots of leftovers from all my papercrafting, I decided to make ATC's (Artist Trading Cards).


The background papers are all from Graphic 45 "Time to Flourish" (8" x 8" paper pad) and were the perfect size for use on an ATC.

The butterflies and dragonflies were stamped using Prima "Butterfly Wings" and the small butterflies are from a small Prima set called "Stationers Desk" (at least, that is the only title I can find on the packet).


These were so easy to make with paper for the background, along with a quote or words and a little winged creature or two.

So, keep your eyes open, you never know where you might find a little abandoned piece of art!
Happy Crafting!

Tuesday, 17 March 2015

Going Green

The theme at this weeks 
is "Going Green"
 
 
The background paper is from Graphic 45 "Time to Flourish".  This paper collection also has lovely little bits & pieces to cut out and add to cards, layouts etc and as I have used the 8" x 8" pad, this little quote was just the right size to add to an ATC.


The butterfly is from Prima "Butterfly Wings" and is coloured using a blend of Distress Inks.

Happy St Patrick's Day to you all!
 
Happy Crafting!
 

Monday, 9 February 2015

Incy Wincy Spider

Now that I know that both recipients have received their 
ATC Nursery Rhyme swaps,
here is how they came into being.....


This is the first of three that I made for this swap.  Initially I had the idea to use corregated card and bend it around to form a pipe (or water spout) but found it was going to be too difficult on an ATC.  Then I went in search of some paper that would be appropriate and found this Kaisercraft paper 
(one of the new collections, but I don't remember which one - oops)
which looks like corregated card.


I stamped "Water Droplets" from Designs by Ryn directly onto the paper with 'jet black' Archival Ink and then added the spider web from "Happy Hauntings" by Graphic 45 to the top corner.


I was thinking about how to attach "Mr Stripes" from Stampotique using thread, and then it came to me "why not make this a slider?" and as they say "the rest is history"!!!
I cut a slot down the centre of the paper, popped the spider onto a little piece of dimensional, and up & down the spout he goes (hehehe).  I then roughed up the edges of the paper before popping dimensionals between the front and back pieces.  

Each slider needed a little pull tag, which was cut with a circle punch twice to sandwich the end of the slidey bit.

I always like to send my ATC in a card, which also helps keep it flat as it journeys across the ocean to far distant lands.
If you come by tomorrow, I'll be back to show the cards that chaperoned the ATCs .....
Happy Crafting!
 

Monday, 26 January 2015

APC Challenge - Week 19

The theme this week for the
Altered Playing Card Challenge
was "Steampunk" using glitter paper, cogs & wheels etc.

I searched for my glitter paper in all the places I could think of but to no avail.  I had packed up my craft things for Christmas and haven't quite worked out where some of them were put.


I started off both backgrounds using a TCW stencil "Mini Gears" and 'black soot' Distress Ink.  The card on the right also has some 'broken china' Distress Ink added just for some extra colour.
 
 
Looking through my stamps, I came across Graphic 45 "Steampunk Spells" with the Witches Brew bottle and wings.  Both were stamped in 'jet black' Archival Ink and coloured with 'broken china' and 'peeled paint' Distress Inks.  I attached the wings with dimensionals and then added two layers of dimensionals to the bottle for extra height.  To finish I added glimmer to the wings using my Wink of Stella pen.


For this card, I looked through the Graphic 45 "Steampunk Spells" paper pad and found the cut image of the winged lady waiting patiently, and she was just the right size for the playing card.  Again I attached her with dimensionals and trimmed a smidgen off the edges to fit.

So although my cards don't quite follow the guidelines this week, I'm happy with them nevertheless.

Thanks for visiting .........
Happy Crafting!
 

Thursday, 22 January 2015

Fondest Wishes

....... getting back to Craftanoon (ahem!), 
the other challenge for the day was to create a scrapbook page, card etc from the sketch provided.  As you would probably have guessed from this blog, I rarely scrapbook, so I made a card.


I decided on a biggish square card using Graphic 45 "Time to Flourish"
papers that I had left over from the book I'd recently made.

I turned the sketch upside down as the little bird on the nest was looking up.  This square is popped onto dimensionals, while the other small squares are lightly sponged with Distress Ink and glued down flat.

I was quite happy with the finished card.  There were half a dozen or so entries in this challenge and it was hard to choose which one to vote for.

Thanks for looking today .....
Happy Crafting!!!
 

Wednesday, 7 January 2015

Birthday Book

HAPPY NEW YEAR!
Wishing you all a CRAFTY and ADVENTUROUS year ahead!
  
 I've just spent a lovely, relaxing 5 days away at my home away from home on the lovely Central Coast of NSW.    My BFF invites me to stay with her family each year during the first week of the new year.  We go for drives and find new things, we watch movies and episodes of Midsomer Murder, we spend time at home crafting - me with papercraft, she with quilting, but the best thing is we get to spend time with each other!

Before I headed off last Friday, I hunted through my 'project' box and found a little book which was in need of decorating, so along with some new Graphic 45 'Time to Flourish' paper and ALL my new stamps and other bits 'n' bobs, my craft bag was packed ready for playing.
Then I packed my clothes, got to get the priorities right!!!

 Front Cover
I think this needs a title and a little bit of embellishment, but until I find exactly what that may be, I'll leave it just as you see it.

Inside Cover & January
I guess this could be a 'birthday book' as each page has a calendar which is sitting in a pocket.

February & March

 April & May
The page that May & June are on is actually clear perspex and so you can see through it to July.

  June & July
Looking at June, you can see the April page.  The July page is made from canvas.

August & September
August is also on the canvas page.  September is on two closed envelopes.

October & November
October is on the back of the two envelopes while November has a side tab.

December & Inside Back Cover

 Back Cover

This was lots of fun to make, the pages have been made using the 8 x 8 pad, and the covers were made with 4 sheets of 12 x 12 papers.

Thanks for looking ......
Happy Crafting!!!

Tuesday, 3 June 2014

Time Waits for No One

The theme this week at
is
Tick Tock - #40

I have a couple of stamps that would fit this theme
quite nicely, but then I looked at my collection
of tags that already have backgrounds
and found the perfect one.


This background tag has a twin as when I stamped them
they were pushed next to each other
and so each tag got half a clock.

I had started off blending Distress Ink colours together,
probably a mix of 'mustard seed' and 'fired brick'.
(I say 'probably' as these tags were done some time ago,
before I owned 'spiced marmalade', and I know
if you blend yellow, red, yellow and just a tad more red,
you get a lovely rich orange colour)

I stamped the winged clock from Graphic 45 "Happy Hauntings"
with 'jet black' Archival Ink 
and gently blended 'spiced marmalade' and 'seedless preserves'
for a bit of contrast to the background.


The quote is hand written on scraps of white card
blended with 'seedless preserves' and just a smidge of 'vintage photo'.

The winged clock and the words were fussy cut
and popped onto dimensionals.

Background clocks are Tim Holtz and ?

To finish I dragged a piece of muslin through 'seedless preserves'
and tied it through the hole on the tag.

Happy Crafting!!!

Friday, 23 May 2014

Lighthouse

Gosh, where does the time go?  Lately I seem to be spending most of my crafting time designing and cutting cardstock for the next class I'm scheduled to teach - phew!!!

But today I decided I was going to play along with some of the challenges that are on this week.


The theme at this week's Tagalong Challenge is "Lighthouses".  Ok, I thought, I don't think I have any stamps with lighthouses, so while I was at Alice in Paperland earlier today, I had a look around and found a Graphic 45 paper from the "By the Sea" collection which suited the theme quite nicely.


My apologies for the photo, unfortunately late afternoon isn't conducive for taking the best shots.

I started with a tag (12cm x 6cm) and covered it with a scrap of newsprint that I found in the craft room and trimmed it to size.  It had a couple of torn edges but that just adds an extra touch.  I edged around the tag with 'Broken China' Distress Ink and just gently along the torn edge.

Next I fussy cut the lighthouse including some of the rocks at its base, inking the white edges with 'Broken China' ink as well, before gluing directly onto the tag with Zig two way glue.

I added the words "let your light shine" using Kaisercraft tiny letters, and finished off the tag with a little snippet of striped ribbon and blue and white wool.


This photo is a much truer colour, but is more out of focus, OOPS!!!

 Happy crafting!!!

Friday, 31 January 2014

Catch-up Complete

The last couple of days have been busy - busy working at Alice in Paperland.  Things are changing at Alice's with the opening of a second store in beautiful Port Macquare on the mid north coast of NSW only a couple of weeks away.    I can feel a weekend away happening before too long so I can go check out how Nicole has arranged this new venture.  Ahh, to feel a lovely sea breeze each day, how lucky she and her family are to embark on this sea-change adventure!

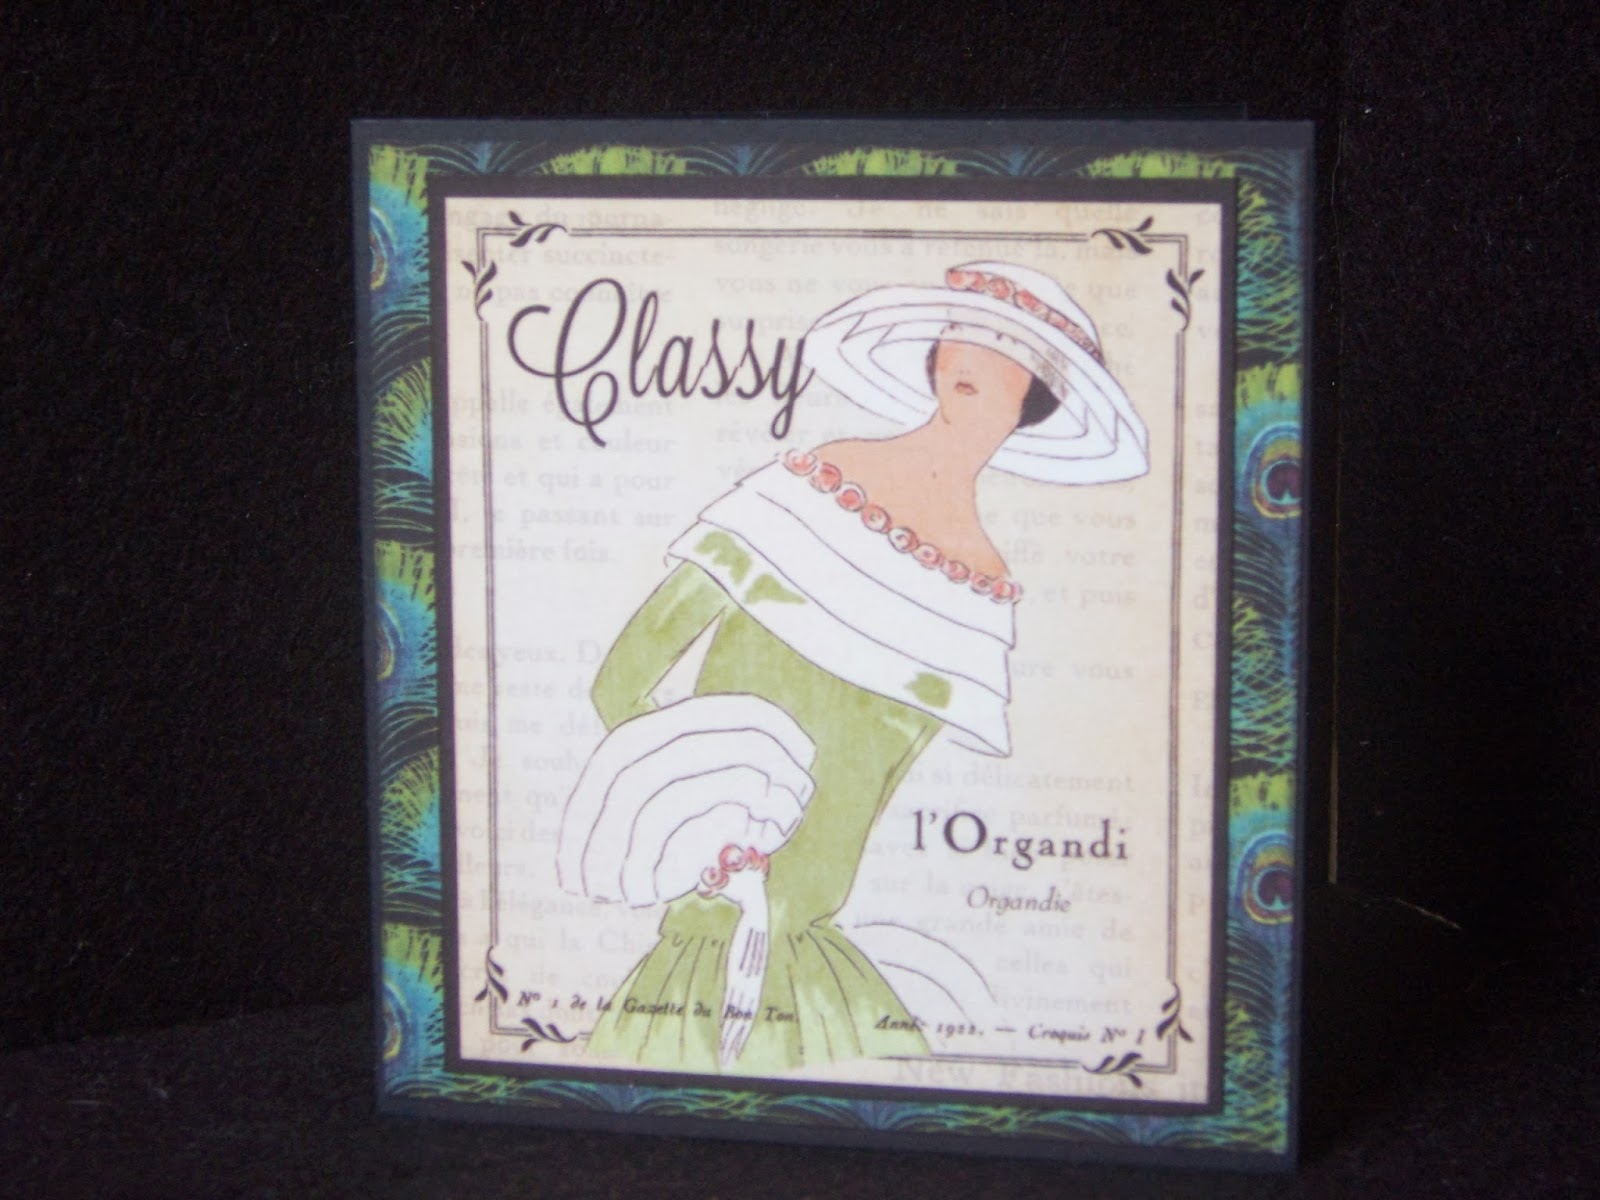
Anyhow, I wanted to pop by and show the last of the things I made at the recent Craftanoon, this time with the gorgeous Graphic 45 'Couture' collection.


This is another elegant range that Graphic 45 has brought out, with images from a bygone era.


I like being able to have co-ordinating inserts and this leftover strip of peacock feathers works beautifully.


These four gift cards were so quick and easy to put together - black cardstock, followed by a mat of peacock feathers and topped off with these lovely images.  Each one also has an ivory insert, otherwise you would have to use a white or silver pen to write with.


Thanks for coming to look today.  I'll be back again (before you know it) with some more fun ideas!

Happy crafting!

Thursday, 23 January 2014

Steampunk Clipboard

Before I headed off to Craftanoon last Saturday, I had a look in my 'projects' box to see what I could take with me and maybe have the time to do something with it.  In my stash I found this clipboard, which is about A5 size, along with three mini clipboards and two frames.  Quickly looking in my Graphic 45 papers I grabbed the 8" x 8" 'Steampunk Spells' as it is a collection that quite appeals to me.

As luck would have it, the Dizzy Izzy girls had a layout challenge for anyone who wanted to take part and so I decided this would be perfect for this clipboard.


There was a main image, a smaller one to the side, and to the side of that were a number of triangles.  Beneath these images were random splotches.  Below the main image was words or sentiments and below that again, were a couple of small places for decoration.

I chose the background paper and cut it just slightly larger than the clipboard, then completely covered the clipboard with a glue-stick and stuck the paper on making sure there were no wrinkles or creases.  I sanded the paper down and around the clipboard before going around the edges with 'black soot' Distress Ink.  Next I spritzed Heidi Swap 'teal' colour shine mist in random splotches for added colour.


I fussy cut the steampunk lady placing her as the main image, then cut out a journalling card and then the title.  The triangles have straight sides but if the images went outside my lines, then I trimmed around the image instead.   Once I was happy with the placement of the various pieces, I glued them all down.  I had thought to layer the lady but since this was a clipboard and I didn't want her damaged if the clipboard is actually used as a clipboard, I decided against this idea.

As my clipboard wasn't quite big enough for adding the bits below the sentiments I decided to leave this out.


So, with a bit of measuring, fussy cutting and moving things around just a wee bit, this is how my finished clipboard looks.  The remaining mini clipboards and frames went back into my 'projects' box for another day.

I'll be back again tomorrow to show what else I made at Craftanoon.  This was such a relaxing, fun day and I managed to achieve what I had taken to play with, so all in all, I was quite pleased with the whole day.

Happy crafting!

Sunday, 17 November 2013

Tag-a-long Christmas

Well, I said I would try to be back here again soon, and well, here I am!  I didn't quite get around to playing with my new stamps but I did finish preparations for my class later in the week, complete with notes.


This set of tags uses Graphic 45 "Twelve Days of Christmas" stamps inked up in Archival 'Jet Black' ink with the backgrounds inked in 'Peeled Paint' and 'Fired Brick' Distress Inks.  Each bottom edge uses a line from Graphic 45 'joyeaux noelle' paper.  The tags are edged with Distress Inks and are finished with co-ordinating ribbon.


The box is a very simple style with lid and box all in one piece - a bit like a pizza box but rectangular and with deeper sides.  A length of ribbon finishes it off.

I've now also finished my class suggestions for next year, complete with description.  The question is though will I remember what I had in mind when the time comes to make samples for the classes?????

This Tag-a-long Christmas class is my last for the year, (breathing a sigh of relief, phew !!!) so let the play time commence ........

Happy crafting!