Saturday, 19 September 2015

Half a Century

I've just finished making another ATC this morning, based on the theme at Wicked Wednesday this week - "Use Numbers".  
Coincidently, it also works with the Stampotique Designers Challenge which is "Milestone Celebrations".


Starting with the background, I blended 'mermaid lagoon', 'dusty concord' and 'peeled paint' Distress Inks together.  Using my handmade circle stencil, I created a 'bokeh' effect with Stampin' Up! 'Whisper White' ink.  Once that was dry, I stamped "50" onto three of the bubbles with black ink.

The steampunk snail is from PaperArtsy Eclectica EM04 and was stamped, fussy cut and coloured using Distress Markers in various colours.

This is the first outing for this rather distinguished snail - hope you like him.

This is my entry to this week's challenges which you can find here:

I'll be back again soon, so be sure to look in!

Happy Crafting!
  
 Edit - The Sisterhood of Snarky Stampers currently has a Steampunk challenge - please have a look!

Monday, 7 September 2015

Queen of Everything

I always have good intentions to play along with challenges, but before I know it, the week has gone and I've missed yet another one!  Yesterday, I wrote down various challenges so that I could see exactly what each was, and today I got playing!


The tag background is a combination of Distress Inks 'mermaid lagoon' and 'abandoned coral'.  The triangles (Carabelle Studios "Woman & Bird") were stamped using Versamark, with Perfect Pearls 'blue smoke' dusted over the top.  A little more background was added using a Kaisercraft stamp (I don't know the name of it, oops!).  Next a layer of Distress Crackle 'clear rock candy' was added and then put aside to allow for drying.


"The Queen of Everything" was stamped onto white cardstock, fussy cut and coloured with Distress Ink and Gelly Roll pens.  I left a lot of white to contrast with the background.  The words were stamped directly onto the tag with Archival Ink.  The "Queen" was popped up on dimensionals, a border was created with black cardstock and the tag was finished with a scrap of black lace.


I am entering this tag in the following challenges:


Thanks for coming by for a peek at today's playtime creation.
I love reading comments, so please leave one if you feel so inclined.

Happy Crafting!

Wednesday, 19 August 2015

Rapunzel

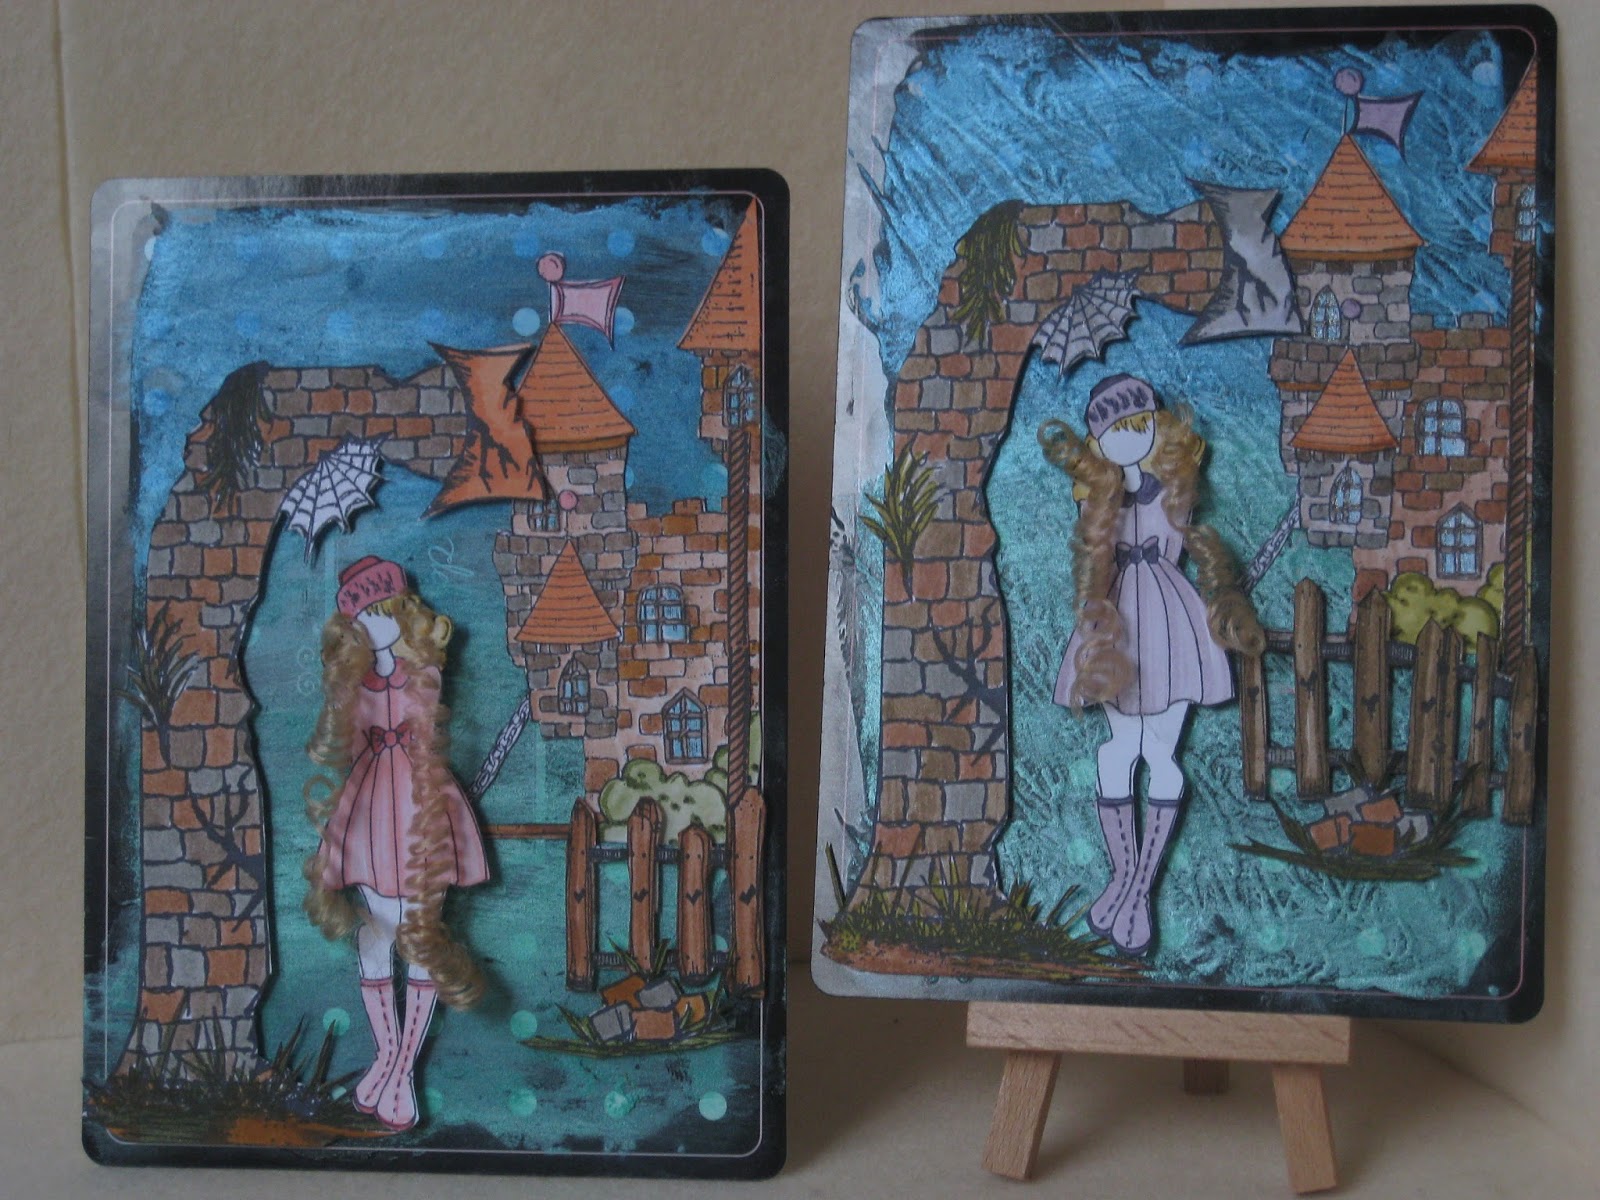
As you may (or may not) know, I enjoy joining in on a couple of international swaps, with a different theme each month.  This month's swap was an 'altered playing card with a fairytale theme' so after a bit of thinking and inspiration from others being posted, this is what I came up with :

Rapunzel

Now, if you are wondering how I fitted so much onto a playing card ...... well, no one said what size the playing card had to be!

I started by covering the back of the card with gesso.  While that was drying I stamped, coloured and cut out all the different pieces that would form the background of my little scene.  A number of different stamps were used for this and these will be listed at the end of this post.

Once the gesso was dry, I used gelatos for the blue and green background.  These add a bit of a shimmer while still allowing a parts of the original card to peep through.

 unaltered side of playing card

 the two cards with slight variations

I'm really not sure what the original purpose of these playing cards would have been, but they were in a container of unwanted goodies that my friend, Jenni, gave me.   On first glance I dismissed them but when this swap was announced using an altered playing card, I gave them a second look - as I said earlier, no one said how big [12.5cm x 18cm] (or small) the playing cards needed to be!

The cards are now winging their way to different parts of the globe, hopefully arriving at their destinations in the not too distant future (fingers crossed Mr Postie).

Playing Card - Heidi Swap
"Edwin's Knight Castle" - Magnolia stamps
"Warm Wishes" - Julie Nutting
"Arch" - Stampotique
"Picket Fence" - Stampotique
"Rope" - Heirloom Ornaments (Spellbinders freebie)

Happy Crafting!

Monday, 17 August 2015

The One

A couple of weeks ago, I found I was a lucky recipient of a couple of freebies from Visible Image, a UK based stamp company.  So after doing a happy dance they arrived at the end of last week, just in the nick of time for an engagement card that was needed for Saturday afternoon.  I couldn't have asked for better timing!   

heart INKognito

I stamped the heart image with VersaMark and heat set fine gold embossing powder.  The words are from SU "Heard from the Heart", one of my favourite go-to sets of sentiments.  I used some gold card for a mat and mounted them onto white cardstock.

the one

The inside sentiment was stamped in 'jet black' Archival Ink.

I was very happy that the card came together quite quickly, was easy to make and looked great.


A BIG thank you to Visible Image for the gorgeous stamps!!!

Happy crafting!
  

Friday, 7 August 2015

Queen of Everything

Yes, believe it or not, I'm back to show you the second birthday card that was mailed this week.


This is one of my new Stampotique stamps by Kate Crane called "Queen of Everything".  
Originally I had barely glanced at this stamp until I saw it at a recent craft show where it had been stamped onto fabric, embroidered over the top and framed.  It looked fabulous and I looked at it with renewed interest.

I decided to do some paper piecing with this card, something I don't normally do but thought would work well.  
I started with my background paper, cutting a third off and flipping it over for a different but co-ordinating pattern.  I trimmed this with a border punch and put it aside.
Next I stamped "Queen of Everything" directly onto the background paper.  I again stamped the image onto an offcut of spotty paper and also the flipside of this paper (have I lost you yet?).  I trimmed around the spotty image gluing it directly over the first one.  With the flipside, I trimmed the crown, wings, collar, circle and house and glued them in place.

From an envelope of goodies I received in the mail recently, I decided to use a paper doily and feather.  These were glued in place.  The background papers were then 'rejoined' with a length of velvet ribbon hiding the join.  I inked around the edges with 'vintage photo' Distress Ink.  This was then layered on another patterned paper which was also edged with Distress Ink, before being adhered to a yellow card base.

To finish off, little dots of gold Liquid Pearls were added to the crown and dress.


The quote on the inside of this card is part of the stamp.

I don't usually make cards with lots of layers although I do like the look of them.  It's something I think I need to practise and I certainly have plenty of papers to practice with!
Thanks for visiting, leave a message if you would like to
and I hopefully it won't be long before I'm back again.
Happy Crafting!
 

Wednesday, 5 August 2015

As time goes by .....

...... yes, I know I haven't been posting much recently and I really don't have any particular excuse except to say Mr Mojo seems to have gone on long service leave and left me in the lurch!  That's not to say I don't look at what everyone is creating and wishing I was as clever as them - and, yes I know, everyone has their own talents including me!   I've even ordered new stamps and am yet to play with them and now Stampotique have just released new designs as well - heeeelp!!!

Anyhow, I needed to make a couple of birthday cards this week and remarkably remembered to take photos of both the front and insides before I wrote in them.


You may recognise the cloud paper from the bookmarks I recently made for a swap.  There was just enough left for this birthday card and for something a little different, I made it into 3 panels.

"Romek" was stamped directly onto the cloud paper and again onto white cardstock. I fussy cut around the balloons and "Romek", coloured them with Distress Markers and glued them directly over the first stamped image.

The sentiment is made using Tim Holtz alphabet stickers.


The inside is stamped using "Enjoy Today".  Both stamps are from Stampotique.

I was pretty chuffed with how this card turned out and hope the recipient enjoyed finding it in the mail!

I'm not making any promises but I'm hoping you'll see this blog updated more regularly!!

Happy Crafting!
 

Saturday, 20 June 2015

A Crafty Weekend!

Earlier in the week, I realised that I hadn't sent a birthday card to one of my friend's daughters, so with my new stamps at-the-ready, I created something just a bit different for a 21st.


The stamps are a set called "Zinouk du jardin" from Carabelle Studio and are stamped & embossed before colouring with Gelly Roll pens.  The sentiment is from SU.

I'm still not sure how appropriate this card was for a 21st, but I hope the 'Birthday Girl' enjoyed it nevertheless.  I can be certain she wouldn't have received another the same!


I spent a lovely day out yesterday with my BFF at the Craft & Quilt Fair which is being held again this year at Glebe Island.  We wandered up and down aisles, oohing & aahing over all the lovely goodies that are displayed and stopping to buy a few bits & pieces along the way.  There was quite a display of handmade quilts, some of which had won prizes.  The amount of work that goes into them is astounding, not to mention the amount of patience required!
As my BFF is in Sydney this weekend staying with her mum, the three of us enjoyed a lovely dinner out tonight at a local club ..... mmm, very nice!

Until next time, 
Happy Crafting!