Wednesday, 26 September 2018

ConGRADulations!

CONGRADULATIONS!
YOU DID IT!!!


There was a bit of a proud parents moment happening this week
when our #3 son graduated with a Bachelor of Arts degree.

Of course, a card was in order
and having browsed an online craft website (shhhhhh .... we won't tell anyone)
I came across this graduate who I thought rather fitted the bill.

 Whilst going through my papers looking for a suitable background
I came across this paper, which is the 'other' side of a pretty floral pattern.
I cut it to size, then stamped the graduate on one side, then again on white card.


 Using Archival 'watering can' ink, I stamped the books on the background, 
overlapping the boy just a little bit.  I then stamped them again on scrap paper,
cut around around them and using this as a mask, 
stamped the 'curiosity' quote, also in 'watering can' ink.

 Using Mr Google, I found what colour robes #3 son would be wearing
and coloured the graduate accordingly, including a white stripe on the collar of the robe.
He was fussy cut and glued directly over the background image.
The sentiment was stamped to complete the card front.

A black border and a yellow card finished it off perfectly.

STAMPS
Stamping Bella - Oddball Boy Graduate
Tim Holtz - Warehouse District; Schoolhouse

I love it when a card comes together without too much fuss and effort
- I wish they would all do that!

  To top it off, my son thought the card was pretty spot on
[apart from the skull on the mortar board - his didn't have one] !!!

HAPPY CRAFTING!
   

Saturday, 22 September 2018

Witches and Bears


Anyone want to join in the fun?
These little ATC Coins are easy to make and lots of fun.


While I had my cuttlebug out last week, I went through my card leftovers [yes, we ALL have them] 
and cut a pile of 2 1/2" circles from plain card, backgrounds etc, ready to make ATC Coins.


In this instance, the backgrounds had been done previously and put aside, 
so all I had to do was decorate each one.


If you haven't already guessed, it was a Halloween themed swap.


I chose three images from different stamp companies, stamped them onto white card, 
then coloured and fussy cut them out.  
They were then glued onto the coins, which were then edged with "wilted violet" Distress Ink.

The back of each coin is labelled with the date, theme and artist, 
packaged up and sent to my swap partner.


Stamps
Julie Nutting - Witchy Poo
Art Impressions - Air Hag Set
Stampotique - Teddy

  I appreciate your looking, thank you!

Happy Crafting!
  

Wednesday, 19 September 2018

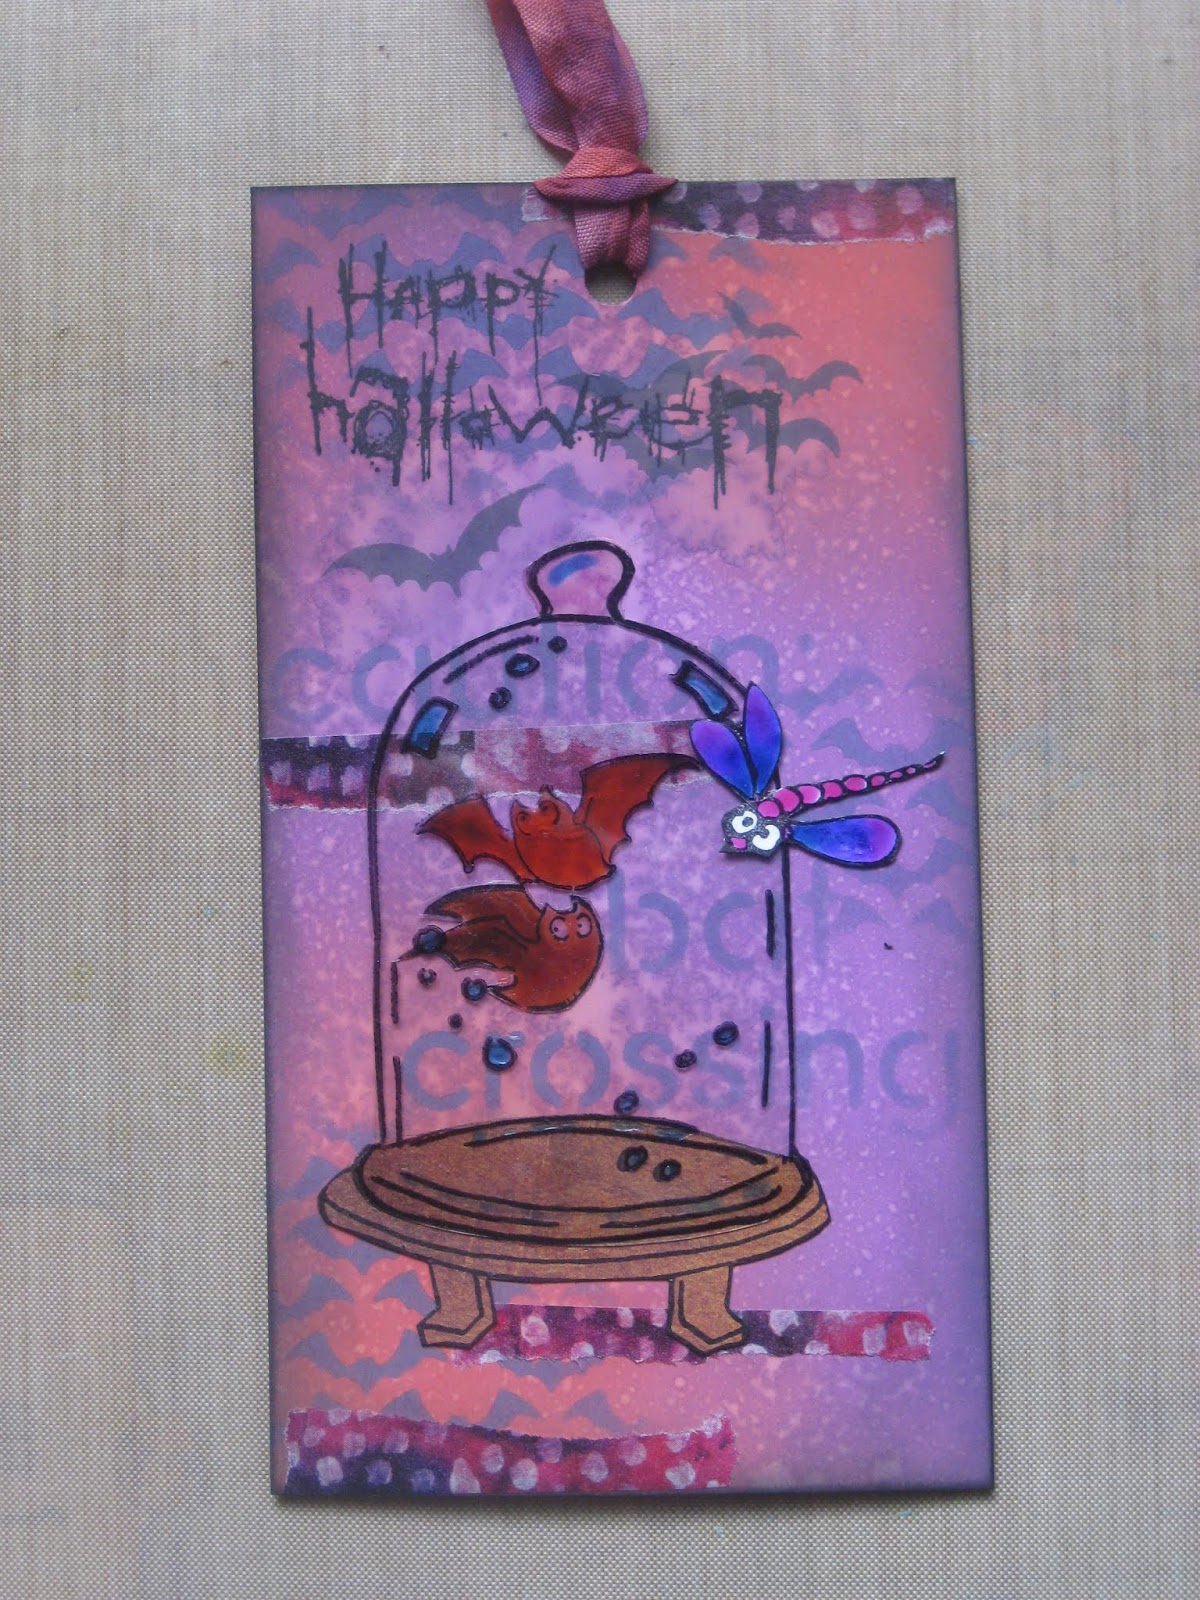
Trio of Halloween


Halloween Trio of Tags
was the theme of a swap in which I participated recently.


I decided to have a play with "Monster Mash" from Dylusions for the main, er ... aliens, 
along with a few other stamps and stencils.
I started with the backgrounds, each one using 'wilted violet' Distress Oxide with another colour added and then spritzed with water and let it run.  
Stencils were used to create the backgrounds on each one. 


The glass jar was stamped onto acetate with StazOn ink, and again on a piece of scrapbook paper for a wood grain look.  Both were fussy cut and carefully glued together where the jar sits on the base.  The captured bats were also stamped onto acetate, then coloured on the reverse with Gelly Glaze pens.  The areas of colour on the jar are also Gelly Glaze pens.   Pieces of torn washi tape were added before assembling the jar.  The sentiment was then added.


I love this character; he really looks like he belongs in a lab somewhere!
I watercoloured him with Distress Inks, adding a touch of Gelly Glaze pens to the buttons, striped leggins and his boots.  His face and hands were coloured with Prismacolor pencils.


On the final tag, I chose this weird little alien who can't believe what he's seeing in the sky!
He is coloured with Prismacolor pencils with highlights of Gelly Glaze on his spots, tongue and eyeballs.

Each tag has a dragonfly, also coloured with Gelly Glaze pens on acetate.

The tags were edged with 'pumice stone' Distress Ink.
Each ribbon was hand coloured to co-ordinate with the tag.

They were fun to put together; hope you like them.

Stamps
Dylusions - Monster Mash
Art Impressions - Air Hag Set
Stampotique - 3 Greetings
Tim Holtz - Simple Sayings

Stencils
Tim Holtz - Mini Set #17; ShatterTHS014
Unknown (words)


HAPPY CRAFTING!
  

Saturday, 15 September 2018

Catching the craze


I'm in a small but friendly FB group of crafty ladies where we share our creations and participate in swaps every so often.  This year for probably various reasons, the interest seems to have wained somewhat, so to give it a kickstart I decided to set up a challenge instead of the usual swap.

The challenge is to create a set of ATC Coins, opened theme
 with your choice of how many you would like to create, so somewhere from 2 - 4 would be perfect.


The backgrounds were cut from card that I had been experimenting with a couple of months ago, so all I needed to do was find some of my favourite friends to add to them.
I first stamped them directly on the backgrounds and then again on white card,
which I coloured, fussy cut and glued directly over the first image.

I trimmed up any overhanging bits and then edged each circle with 'pumice stone' Distress Ink.
Stickers were added to each ATC Coin.

Easy Peasy!
I can see why these are just as addictive as ATCs.

Stamps
Stampotique - "Chicken";  "Fofe";  "Dwindled";  "Checkers" 


Whatever you are doing this weekend, stay safe and have fun.

Happy Crafting!
   

Tuesday, 4 September 2018

Monsters

I'm back .....
where have I been?  More like, where haven't I been!
However, yes I'm back, after my little craft break,
so to begin with, I thought I'd try my hand at the latest thing
ATCoins


I ran my usual favourite cardstock through the Cuttlebug using a circle die which is just a bit smaller than 2.5cm wide.  I had already done the background some time ago when I was just fiddling around, so all I had to do was find stamps the right size, and these cute monsters were perfect.

I stamped them directly onto the background and again on white cardstock.  I also stamped the uneven circles on the backgrounds.
I coloured the monsters with Prismacolor pencils, fussy cut them and glued them directly over the first image.  I edged the coins with 'pumice stone' Distress Ink to soften the hard edges. Easy peasy!

Stamps
AALL and CREATE # 53 

Now, I do have a question regarding these coins.

I have made these with just regular cardstock, however, are they supposed to be thicker, resembling an actual coin?  I can't find anywhere that says this, but someone suggested this to be the case.

Anyhow, if you know the answer or have any other comments, I'm open to suggestions.

I'll be back again very soon.

Happy Crafting!


Sunday, 20 May 2018

Love and Sympathy

Whenever I'm asked to make a card for a particular person or occasion,
one of the first things I ask is "does the person have a favourite colour" 
as I find it is a good place to start.
Today's card was started from the colour red and continued from there.


I wanted to use flowers, as the request was for a Sympathy card,
so I chose this lovely bouquet from Stampotique called "Flos".
I stamped it onto 'confetti white' cardstock (Stampin' Up! - discontinued) as I felt the speckles around the flowers went perfectly with a speckles which are randomly found in this cardstock.
I then coloured the image with Inktense blocks and a water pen.


A sentiment was stamped in the bottom right corner before a length of ribbon
 was wrapped around the card with a separate bow attached.

The card was matted with a piece of red foil type of paper
and then attached to a folded A4 card, the same as the main piece.
A card insert with a lovely sentiment was also attached to the inside.

This was quite a large card, however it was for a number of people to sign
before being given to the bereaved lady in question.

 Stamps
Stampotique - Flos
Stampin' Up! - Love and Sympathy
  
Thanks for looking today.
I'm taking a little break from crafting for a while, 
however I will return again later in the year.

In the meantime ..... Happy Crafting!

Thursday, 10 May 2018

Butterfly Wishes


The Catchy Crafts Creative Team this month, 
was given the theme of Butterflies.

Looking through my stash, I came across these gorgeous flowers
and so it made sense for the general overall colour of this card to be pink.


As I had recently purchased the slider die, but hadn't yet played with it,
I decided to use it on this card allowing the butterfly to fly!


I started by gathering all the supplies I would need, 
starting with the embossing folder and running it through the Cuttlebug with pink textured card.


It was easy to see where to place the slider for the butterfly once the embossed design was done.

To allow the butterfly to move freely, I punched at least 10 circles from scrap card and 2 from the pink card.  I glued the circles together in two sets, making sure there was a pink circle on the top of both.  One set goes underneath the curve, the other on top of the curve.  There is a tiny piece of foam tape gluing the two sets together which allows the butterfly to move along the curve freely.
Another piece of pink card was placed below the slider cut out using foam tape.  This allows the built up circles on the underside of the cut out to move freely.

The card was layered onto pink glitter card using foam tape
and then adhered to a white card base with double sided tape.
Once I was happy with the flower placement, they were glued into position with Tombow Mono Liquid Glue.

Materials
Crafts 4 U Embossing Folder - Butterfly and Vine
Crafts 4 U Dies - Claudie Butterfly Medium; Slide Alongs
Paper Roses - Stitched Simple Tags die
Impression Obsession - Butterfly Wishes
Little Birdie Flowers
Other - 1/2" hole punch 

 For more details or to see other ideas from the Creative Team,


Happy Crafting!