The last couple of days have been busy - busy working at Alice in Paperland. Things are changing at Alice's with the opening of a second store in beautiful Port Macquare on the mid north coast of NSW only a couple of weeks away. I can feel a weekend away happening before too long so I can go check out how Nicole has arranged this new venture. Ahh, to feel a lovely sea breeze each day, how lucky she and her family are to embark on this sea-change adventure!
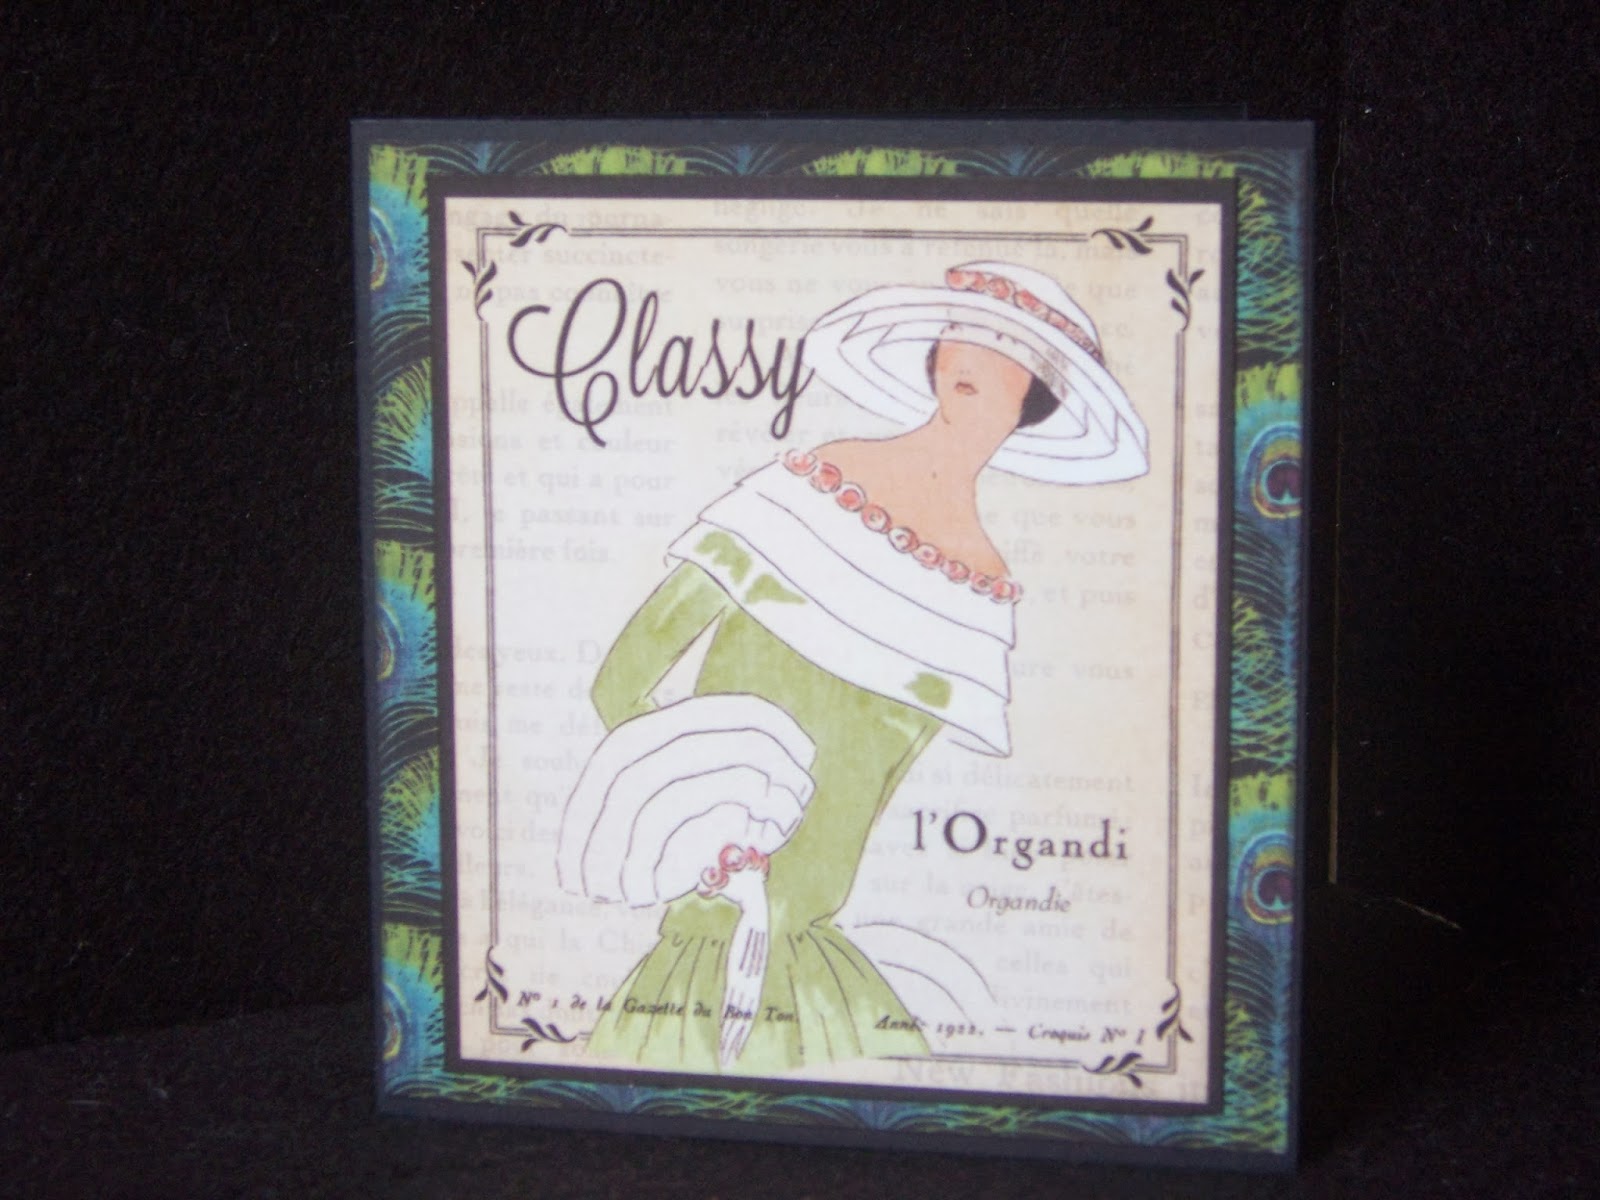
Anyhow, I wanted to pop by and show the last of the things I made at the recent Craftanoon, this time with the gorgeous Graphic 45 'Couture' collection.
This is another elegant range that Graphic 45 has brought out, with images from a bygone era.
I like being able to have co-ordinating inserts and this leftover strip of peacock feathers works beautifully.
These four gift cards were so quick and easy to put together - black cardstock, followed by a mat of peacock feathers and topped off with these lovely images. Each one also has an ivory insert, otherwise you would have to use a white or silver pen to write with.
Thanks for coming to look today. I'll be back again (before you know it) with some more fun ideas!
Happy crafting!
Friday, 31 January 2014
Tuesday, 28 January 2014
Delivered at last!
Woohoo !!! The long awaited mail has finally arrived. Goodness only knows why we didn't get any mail at all last week. I even went next door and asked my neighbour had they received any mail. They had, but only on one day. Anyway, today there was mail, and not one but two exciting packages were MINE !!! Woohoo !!!
The first one I opened was the ATC swap which had winged its way from the UK. So EXCITING to open it and discover it was wrapped in lengths of ribbon - thanks for the added bonus.
My camera just doesn't do this delightful ATC justice. So many little details to look at and I just love it !!!
Thanks Karen, you may be having a frosty winter in your neck of the woods, but here we're having some lovely summer weather, although a bit too hot at times.
My second package which was also in today's mail, had winged its way from Canada and were the stamps I had ordered from 'Designs by Ryn'.
Can't wait to play with them, especially the 'water droplets' . I've seen it used a number of times now (thanks Eileen) and it really looks like there are drops of water on the surface of the card or journal.
Happy, happy crafting !!!
The first one I opened was the ATC swap which had winged its way from the UK. So EXCITING to open it and discover it was wrapped in lengths of ribbon - thanks for the added bonus.
My camera just doesn't do this delightful ATC justice. So many little details to look at and I just love it !!!
Thanks Karen, you may be having a frosty winter in your neck of the woods, but here we're having some lovely summer weather, although a bit too hot at times.
My second package which was also in today's mail, had winged its way from Canada and were the stamps I had ordered from 'Designs by Ryn'.
Can't wait to play with them, especially the 'water droplets' . I've seen it used a number of times now (thanks Eileen) and it really looks like there are drops of water on the surface of the card or journal.
Happy, happy crafting !!!
Monday, 27 January 2014
Favourite Team Colours
I don't really follow any teams, but if I did it would have to be my DH's and his favourite team has red & white as its team colours. At Wicked Wednesday this week, the theme is (you guessed it) 'Favourite Team Colours'.
When I was at Craftanoon last week, I picked up a packet of Heidi Swap 'Banners' which have about 8 lengths of different shapes, and all are white with various resist patterns on them. I chose one of these, cut to the length I needed for the ATC, and blended over it with 'fired brick' Distress Ink.
I also had one little monster left over from Stampotique 'Line Up' who jumped up and down excitedly, saying "pick me, pick me" , so he had a 'fired brick' makeover as well. He needed a little flag to wave so I wrote on some scrap white card, outlined around the edge with a pen, and then drew in the stick, colouring it with a Distress Marker before cutting it out.
I edged the ATC with some 'black soot' and stamped some foliage so the monster had somewhere to stand on the sidelines. Little monster and his flag are popped onto dimensionals.
I'm entering this ATC at the Wicked Wednesday challenge.
Happy crafting!
When I was at Craftanoon last week, I picked up a packet of Heidi Swap 'Banners' which have about 8 lengths of different shapes, and all are white with various resist patterns on them. I chose one of these, cut to the length I needed for the ATC, and blended over it with 'fired brick' Distress Ink.
I also had one little monster left over from Stampotique 'Line Up' who jumped up and down excitedly, saying "pick me, pick me" , so he had a 'fired brick' makeover as well. He needed a little flag to wave so I wrote on some scrap white card, outlined around the edge with a pen, and then drew in the stick, colouring it with a Distress Marker before cutting it out.
I edged the ATC with some 'black soot' and stamped some foliage so the monster had somewhere to stand on the sidelines. Little monster and his flag are popped onto dimensionals.
I'm entering this ATC at the Wicked Wednesday challenge.
Happy crafting!
Sunday, 26 January 2014
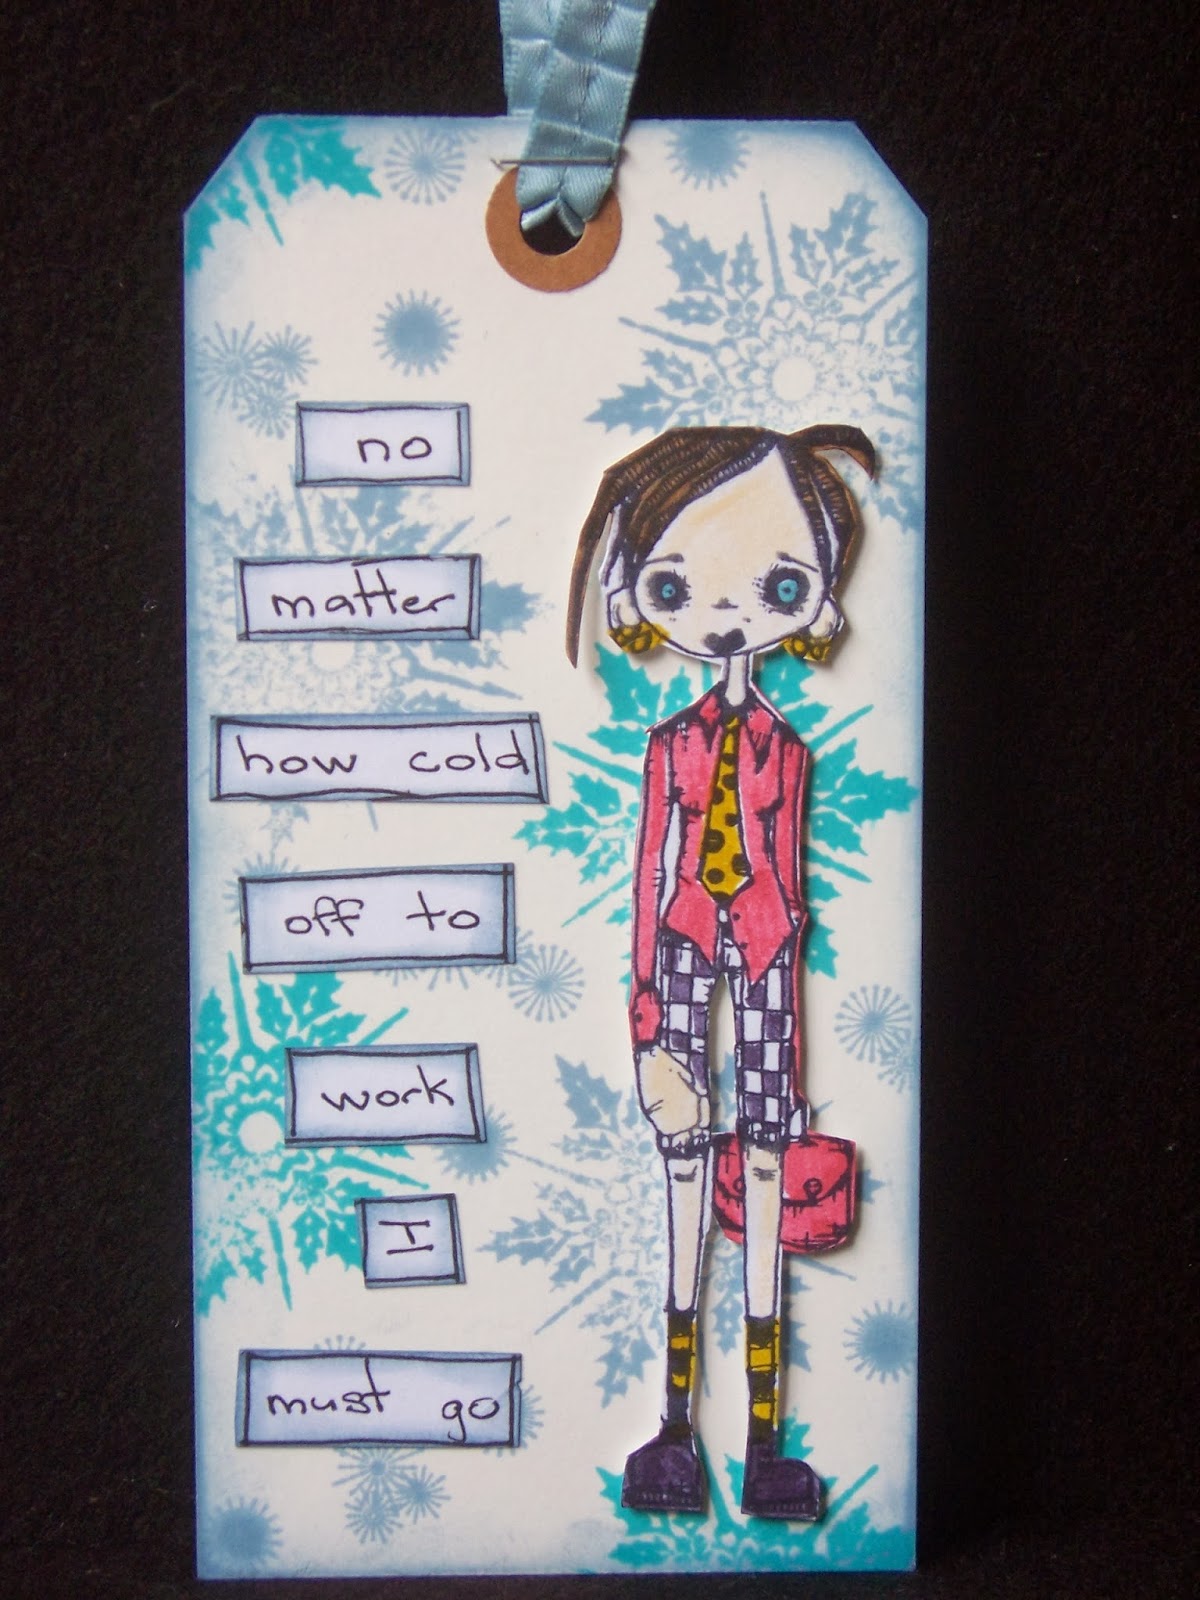
No matter how cold
Even in the middle of winter, Sydney simply doesn't get cold enough for it to snow (although it feels that way sometimes) and so I wondered how I could create a snowy, cold image for the Tagalong challenge this week, which is 'Snow and Ice', especially when it's summer here.
I was inspired by Corrie's tag "Ice Queen" but really didn't know how to go about creating a background until I happened to look at Craft Stamper magazine, December 2012 issue which had a freebie snowflake on the front cover. I've been buying these magazines for quite some time but rarely use the stamps on the front (although I like getting freebies) and once I file the magazine away, I tend to forget about the stamps. Hmmm, maybe it's time I took all the stamps off and find a nice little box for them and then I might use them!) Anyhow, back to the tag in question .....
I started off by stamping the freebie snowflake in 'stormy sky' and 'peacock feathers' and then found another freebie stamp set (possibly from a Docrafts magazine?) which had tiny images that could pass as snowflakes, so I randomly stamped these in the blank spaces.
Next I stamped 'Gibi' (Stampotique) onto cardstock and coloured her with Distress Markers and then cut around her, popping her onto dimensionals. I decided she would look more balanced on the right hand side of the tag with a quote to the left. The words are my own and hand-written - I'm not sure if they quite make sense, and there probably should be a comma after 'cold', but somehow it looked right.
I edged around each of the words and the tag with 'stormy sky' Distress Ink and finished with a piece of pleated ribbon (SU) stapled into place.
I'm entering this in the Tagalong Challenge 'Snow and Ice'.
Happy crafting!
I was inspired by Corrie's tag "Ice Queen" but really didn't know how to go about creating a background until I happened to look at Craft Stamper magazine, December 2012 issue which had a freebie snowflake on the front cover. I've been buying these magazines for quite some time but rarely use the stamps on the front (although I like getting freebies) and once I file the magazine away, I tend to forget about the stamps. Hmmm, maybe it's time I took all the stamps off and find a nice little box for them and then I might use them!) Anyhow, back to the tag in question .....
I started off by stamping the freebie snowflake in 'stormy sky' and 'peacock feathers' and then found another freebie stamp set (possibly from a Docrafts magazine?) which had tiny images that could pass as snowflakes, so I randomly stamped these in the blank spaces.
Next I stamped 'Gibi' (Stampotique) onto cardstock and coloured her with Distress Markers and then cut around her, popping her onto dimensionals. I decided she would look more balanced on the right hand side of the tag with a quote to the left. The words are my own and hand-written - I'm not sure if they quite make sense, and there probably should be a comma after 'cold', but somehow it looked right.
I edged around each of the words and the tag with 'stormy sky' Distress Ink and finished with a piece of pleated ribbon (SU) stapled into place.
I'm entering this in the Tagalong Challenge 'Snow and Ice'.
Happy crafting!
Saturday, 25 January 2014
Star Keeper
I'm quite enjoying creating something for various challenges lately, and this card works for two of them, Stampotique Designers Challenge and Sunday Sketch and Stamp Challenge.
I'm not sure if "Key Keeper" likes his new title or not, but for today's post he will be known as "Star Keeper" as he has a lovely star hanging from the chain around his neck.
The only alteration I have made to this weeks sketch is a row of hanging stars instead of a banner, but the remainder is unchanged.
I started with a 13.5cm x 13.5cm black shimmer card as the base. A piece of baby blue shimmer paper was cut to size and stamped second generation with a freebie swirly stamp although it's hard to see. The paper was stuck in place and the row of stars in 'jet black' Archival was stamped across the top. The stars were a freebie stamp on the front on Craft Stamper magazine from November 2012. How do I know this? Well, I've been buying the magazine for some time now, but have not often used the stamp and this one was still attached to the front, hence how I know which issue it came with.
"Key Keeper" was chosen as he was the right size to fit under the stars overhead. He was stamped on white cardstock in 'jet black' and coloured with watercolour pencils and fussy cut. I then stamped a large star from the row onto white card and cut it out before glueing it over his 'key' pendant. A diamond was placed in the centre of the star and three smaller diamonds added to the star border.
"Star Keeper" was then popped onto dimensionals. The border and the words came from Tim Holtz 'Simple Sayings'. To finish off I mounted the black base onto 14cm x 14cm white cardstock.
I'm entering this card in : Stampotique Designers Challenge
Sunday Sketch and Stamp Challenge
Happy crafting!
I'm not sure if "Key Keeper" likes his new title or not, but for today's post he will be known as "Star Keeper" as he has a lovely star hanging from the chain around his neck.
The only alteration I have made to this weeks sketch is a row of hanging stars instead of a banner, but the remainder is unchanged.
I started with a 13.5cm x 13.5cm black shimmer card as the base. A piece of baby blue shimmer paper was cut to size and stamped second generation with a freebie swirly stamp although it's hard to see. The paper was stuck in place and the row of stars in 'jet black' Archival was stamped across the top. The stars were a freebie stamp on the front on Craft Stamper magazine from November 2012. How do I know this? Well, I've been buying the magazine for some time now, but have not often used the stamp and this one was still attached to the front, hence how I know which issue it came with.
"Key Keeper" was chosen as he was the right size to fit under the stars overhead. He was stamped on white cardstock in 'jet black' and coloured with watercolour pencils and fussy cut. I then stamped a large star from the row onto white card and cut it out before glueing it over his 'key' pendant. A diamond was placed in the centre of the star and three smaller diamonds added to the star border.
"Star Keeper" was then popped onto dimensionals. The border and the words came from Tim Holtz 'Simple Sayings'. To finish off I mounted the black base onto 14cm x 14cm white cardstock.
I'm entering this card in : Stampotique Designers Challenge
Sunday Sketch and Stamp Challenge
Happy crafting!
Thursday, 23 January 2014
Steampunk Clipboard
Before I headed off to Craftanoon last Saturday, I had a look in my 'projects' box to see what I could take with me and maybe have the time to do something with it. In my stash I found this clipboard, which is about A5 size, along with three mini clipboards and two frames. Quickly looking in my Graphic 45 papers I grabbed the 8" x 8" 'Steampunk Spells' as it is a collection that quite appeals to me.
As luck would have it, the Dizzy Izzy girls had a layout challenge for anyone who wanted to take part and so I decided this would be perfect for this clipboard.
There was a main image, a smaller one to the side, and to the side of that were a number of triangles. Beneath these images were random splotches. Below the main image was words or sentiments and below that again, were a couple of small places for decoration.
I chose the background paper and cut it just slightly larger than the clipboard, then completely covered the clipboard with a glue-stick and stuck the paper on making sure there were no wrinkles or creases. I sanded the paper down and around the clipboard before going around the edges with 'black soot' Distress Ink. Next I spritzed Heidi Swap 'teal' colour shine mist in random splotches for added colour.
I fussy cut the steampunk lady placing her as the main image, then cut out a journalling card and then the title. The triangles have straight sides but if the images went outside my lines, then I trimmed around the image instead. Once I was happy with the placement of the various pieces, I glued them all down. I had thought to layer the lady but since this was a clipboard and I didn't want her damaged if the clipboard is actually used as a clipboard, I decided against this idea.
As my clipboard wasn't quite big enough for adding the bits below the sentiments I decided to leave this out.
So, with a bit of measuring, fussy cutting and moving things around just a wee bit, this is how my finished clipboard looks. The remaining mini clipboards and frames went back into my 'projects' box for another day.
I'll be back again tomorrow to show what else I made at Craftanoon. This was such a relaxing, fun day and I managed to achieve what I had taken to play with, so all in all, I was quite pleased with the whole day.
Happy crafting!
As luck would have it, the Dizzy Izzy girls had a layout challenge for anyone who wanted to take part and so I decided this would be perfect for this clipboard.
There was a main image, a smaller one to the side, and to the side of that were a number of triangles. Beneath these images were random splotches. Below the main image was words or sentiments and below that again, were a couple of small places for decoration.
I chose the background paper and cut it just slightly larger than the clipboard, then completely covered the clipboard with a glue-stick and stuck the paper on making sure there were no wrinkles or creases. I sanded the paper down and around the clipboard before going around the edges with 'black soot' Distress Ink. Next I spritzed Heidi Swap 'teal' colour shine mist in random splotches for added colour.
I fussy cut the steampunk lady placing her as the main image, then cut out a journalling card and then the title. The triangles have straight sides but if the images went outside my lines, then I trimmed around the image instead. Once I was happy with the placement of the various pieces, I glued them all down. I had thought to layer the lady but since this was a clipboard and I didn't want her damaged if the clipboard is actually used as a clipboard, I decided against this idea.
As my clipboard wasn't quite big enough for adding the bits below the sentiments I decided to leave this out.
So, with a bit of measuring, fussy cutting and moving things around just a wee bit, this is how my finished clipboard looks. The remaining mini clipboards and frames went back into my 'projects' box for another day.
I'll be back again tomorrow to show what else I made at Craftanoon. This was such a relaxing, fun day and I managed to achieve what I had taken to play with, so all in all, I was quite pleased with the whole day.
Happy crafting!
Wednesday, 22 January 2014
Beloved Teddy
I recently had the pleasure of being part of an international swap where the theme was "Beloved" and we had to use Stampotique stamps (it being a Stampotique site) to create an ATC. An ATC is an Artist's Trading Card and is 2 1/2" x 3 1/2" in size. I rather liked the idea of swapping with someone from around the world and was quite chuffed to get Sonja who lives in The Netherlands.
So, with love in his heart, I chose 'Heart Throb' and his beloved companion 'Teddy' for my ATC. Both 'Heart Throb' and 'Teddy' were coloured with water-colour pencils and fussy cut. I also cut around his hand so 'Teddy' could be tucked under his arm.
The background is 'mustard seed' Distress Ink with a touch of 'spiced marmalade' around the edges.
I had bought a new template recently called 'mini confetti' (TCW - the crafters workshop) and liked the idea that it has oddly shaped hearts randomly added to splotches and a couple of other funny little details. I placed the template so that the hearts would be to the side of Heart Throb, and used Impasto Medium (a texture paste) with a spatular before putting it aside to dry. Once it was dried, I gently added red metallic stuff (sorry, I don't know what it's called and have had it for simply ages) with my finger-tip to highlight the raised textured hearts.
I placed a little piece of washi tape at the bottom for Heart Throb to stand on, but it seemed to be missing something. That something was the dictionary meaning of "beloved - adj: dearly loved; n: person dearly loved" which I tore from an old dictionary that I used at school many, many years ago and which had long since lost it's cover.
Heart Throb and Teddy were popped onto dimensionals and the ATC was finished.
I hope there might be another swap again as this was such fun to be part of, especially as you don't know where in the world your ATC will come from. I'm looking forward to recieving mine - ooh, can't wait!!!
Happy crafting!
So, with love in his heart, I chose 'Heart Throb' and his beloved companion 'Teddy' for my ATC. Both 'Heart Throb' and 'Teddy' were coloured with water-colour pencils and fussy cut. I also cut around his hand so 'Teddy' could be tucked under his arm.
The background is 'mustard seed' Distress Ink with a touch of 'spiced marmalade' around the edges.
I had bought a new template recently called 'mini confetti' (TCW - the crafters workshop) and liked the idea that it has oddly shaped hearts randomly added to splotches and a couple of other funny little details. I placed the template so that the hearts would be to the side of Heart Throb, and used Impasto Medium (a texture paste) with a spatular before putting it aside to dry. Once it was dried, I gently added red metallic stuff (sorry, I don't know what it's called and have had it for simply ages) with my finger-tip to highlight the raised textured hearts.
I placed a little piece of washi tape at the bottom for Heart Throb to stand on, but it seemed to be missing something. That something was the dictionary meaning of "beloved - adj: dearly loved; n: person dearly loved" which I tore from an old dictionary that I used at school many, many years ago and which had long since lost it's cover.
Heart Throb and Teddy were popped onto dimensionals and the ATC was finished.
I hope there might be another swap again as this was such fun to be part of, especially as you don't know where in the world your ATC will come from. I'm looking forward to recieving mine - ooh, can't wait!!!
Happy crafting!
Subscribe to:
Posts (Atom)