Gosh, it's November already! October simply flew past with so many things happening, no wonder I'm feeling just a wee bit weary, although at this end of the year, you tend to feel that way, don't you?
Last weekend I had my stall (with my BFF) at the local school's Spring Fair. The weather was perfect, not too hot with a little breeze wafting around and a reasonable number of people attending. Oddly enough most of my new handmade items for sale didn't but quite a number of my pre-loved stamps and ink pads did - sell that is. I guess markets/fairs are a bit like that, sometimes the're successful while othertimes the're not. My BFF didn't have much success either with her colourful children's backpacks, coin purses and quilted purses; and her daughter was selling friendship bracelets, all handmade - I felt quite disappointed for them both. The upside was that I got to spend a whole day with my BFF!!! Some of the other stalls around us didn't have terribly much business either as three of them had packed and gone by 1.30pm, and the Fair didn't finish until 3pm!
This weekend is the Paper Crafts Festival at Penrith which I'll be heading out to tomorrow. Alice in Paperland has quite a large stall and I'll be demonstrating probably through to lunchtime. I'm planning on decorating envelopes with Distress Inks and stencils etc. I've made some samples to start off and hope my mojo doesn't dessert me 'cause it wasn't being terribly helpful yesterday!
A few weeks ago, one of my friends asked if I would make a card for a good friend who had just become engaged. She wanted something fancy with initials of the couple, using pink, purple or red but definitely NOT green and on A4 folded in half (ie a big card). So with a bit of thought, umming & ahhhing, this is what I came up with :
I find it quite difficult to do fancy/fussy cards, so I started with the letters. I have a box of large chipboard letters that I've had for quite a number of years now (and rarely used), inked them up with SU's white craft inkpad, dried with the heatgun and added purple bling in different sizes. What to do next?
I cut a tag from purple cardstock, folded a paper doily around it, and cut the butterfly using SU's embosslits die. A few purple bling for the body ties in nicely with the letters. I was trying to work out how to attach the heart which has a small hole to tie it on with, and then realised that the stem on one of the roses would go through perfectly. Then I attached the ribbon and the flowers.
At this point with the main elements done, but not stuck down, there was still something missing - the background just wasn't working as it was too plain. So out came my Cuttlebug and my collection of embossing folders and voila, all fixed and looking much better, which meant everything could now be put together to create the finished card.
Only the insides to finish off, and out came two of my favourite SU stamps, they just add a perfect touch of elegance to any card! Finding an envelope large enough, ah now that's another story!!!
I couldn't post this until I knew the happy engaged couple had received their card, so I hope they like it !!!
Happy crafting!
Saturday, 2 November 2013
Friday, 25 October 2013
Something wicked ........
Phew, it's been a very busy week (actually, it's been a very busy month) and with 6 days away and a Spring Fair tomorrow, this end of the week has been a flurry of finishing things off for the stall. However, I think I'm pretty well organised now and hope to have an enjoyable day tomorrow.
So with things now finished, I decided to have a play and enter a couple of challenges that are running this week. Over at Stampotique, the theme is Fabric or Lace and at Tagalong, the theme is Steampunk Hallowe'en, so put the two of them together and this is what I've come up with.
I took a tag, and started with Distress Ink 'mustard seed' covering the tag, then added 'fired brick' over the top giving it a slightly mottled look, before again going over it with 'mustard seed'. I was trying to give it an orange look (in real life it is a bit more orange), and then finished off around the edges with 'black soot'.
Next the web and spider (Graphic 45 'Happy Hauntings') were stamped in Archival 'watering can' followed by the owls and the steampunk flying clock (Graphic 45 'steampunk spells'). The words were stamped in Archival 'jet black', cut out and lightly edged with 'fired brick' before being glued into place.
The lovely "Gooseneck" was stamped onto ivory cardstock, fussy cut with a piece of lace as an underskirt, and popped onto dimensionals. She was coloured with Distress Markers 'wild honey' and 'peeled paint'. To finish off, another length of lace was added in place of ribbon.
And there you have it - my entry for this week's challenges.
Hope you like it and you are welcome to leave any comments so long as they are nice ones!
Happy crafting!
So with things now finished, I decided to have a play and enter a couple of challenges that are running this week. Over at Stampotique, the theme is Fabric or Lace and at Tagalong, the theme is Steampunk Hallowe'en, so put the two of them together and this is what I've come up with.
I took a tag, and started with Distress Ink 'mustard seed' covering the tag, then added 'fired brick' over the top giving it a slightly mottled look, before again going over it with 'mustard seed'. I was trying to give it an orange look (in real life it is a bit more orange), and then finished off around the edges with 'black soot'.
Next the web and spider (Graphic 45 'Happy Hauntings') were stamped in Archival 'watering can' followed by the owls and the steampunk flying clock (Graphic 45 'steampunk spells'). The words were stamped in Archival 'jet black', cut out and lightly edged with 'fired brick' before being glued into place.
The lovely "Gooseneck" was stamped onto ivory cardstock, fussy cut with a piece of lace as an underskirt, and popped onto dimensionals. She was coloured with Distress Markers 'wild honey' and 'peeled paint'. To finish off, another length of lace was added in place of ribbon.
And there you have it - my entry for this week's challenges.
Hope you like it and you are welcome to leave any comments so long as they are nice ones!
Happy crafting!
Sunday, 13 October 2013
Handles, Hinges, Buckles, Fasteners, Pulls
In between making 'cheap & cheerful' items for the Spring Fair, was the need to just play, so that's what I did with this tag which is also this week's challenge at Stampotique - Handles, Hinges, Buckles, Fasteners, Pulls.
My first idea was to use a zipper and I was hoping there may have been an old one in Mum's button tin, but alas it was not to be (sigh), BUT there were a number of old belt buckles which would have come off dresses many years ago. This one caught my eye as it was a lovely bright sort of 'peacock feathers' colour and as I rummaged through my ribbons I thought the contrast would certainly stand out with this spotty one.
The background colour is a combination of Distress Inks 'peacock feathers', 'fired brick' and 'mustard seed' blended together with a touch more peacock feathers around the edges.
Next I stamped "Gibi", coloured her with Distress Markers and did some fussy cutting before popping her up on dimensionals. I attached the ribbon, added the words and finished with a washi tape ribbon.
I'm entering Gibi in this week's challenge at Stampotique.
Thanks for visiting and comments are always appreciated (nice ones especially).
Happy crafting!
My first idea was to use a zipper and I was hoping there may have been an old one in Mum's button tin, but alas it was not to be (sigh), BUT there were a number of old belt buckles which would have come off dresses many years ago. This one caught my eye as it was a lovely bright sort of 'peacock feathers' colour and as I rummaged through my ribbons I thought the contrast would certainly stand out with this spotty one.
The background colour is a combination of Distress Inks 'peacock feathers', 'fired brick' and 'mustard seed' blended together with a touch more peacock feathers around the edges.
Next I stamped "Gibi", coloured her with Distress Markers and did some fussy cutting before popping her up on dimensionals. I attached the ribbon, added the words and finished with a washi tape ribbon.
I'm entering Gibi in this week's challenge at Stampotique.
Thanks for visiting and comments are always appreciated (nice ones especially).
Happy crafting!
Saturday, 12 October 2013
Hocus Pocus
I recently discovered a new challenge (well, new to me anyway) who's theme for the month of October is along halloweeny lines, and this week it's 'Hocus Pocus'. It appears you can use any company's goodies, so long as it is a 'tag'. Since I quite enjoy making tags I thought I'd join in with this week's challenge.
I started with the background using Distress Inks, mustard seed, fired brick and seedless preserves, blended together. I then stamped the teddy magician (Lucy's Stamps) directly onto the tag and again onto cardstock before colouring him with Distress Markers. To get a lighter shading on his robe, I scribbled dusty concord onto a cellophane bag (you make do with what is available at the time) and picked the colour up with a water brush. He was then fussy cut (not the shimmer around his crystal ball though) and glued directly over the first image. The spider and web were stamped from Graphic 45 'Happy Hauntings', and the words are a set of alphabet stamps which come in handy for all sorts of projects.
To finish off the tag, silver kindyglitz was added to highlight the crystal ball and his robes, and some yarn completed the tag.
I've had this teddy stamp in my stash for quite a few years now and always thought him rather cute. I'm not even sure if Lucy's Stamps still exist anymore, but thought he was perfect for the Hocus Pocus theme.
I'm entering him in this week's challenge at www.tagalongchallenge.blogspot.co.uk
Happy crafting!
I started with the background using Distress Inks, mustard seed, fired brick and seedless preserves, blended together. I then stamped the teddy magician (Lucy's Stamps) directly onto the tag and again onto cardstock before colouring him with Distress Markers. To get a lighter shading on his robe, I scribbled dusty concord onto a cellophane bag (you make do with what is available at the time) and picked the colour up with a water brush. He was then fussy cut (not the shimmer around his crystal ball though) and glued directly over the first image. The spider and web were stamped from Graphic 45 'Happy Hauntings', and the words are a set of alphabet stamps which come in handy for all sorts of projects.
To finish off the tag, silver kindyglitz was added to highlight the crystal ball and his robes, and some yarn completed the tag.
I've had this teddy stamp in my stash for quite a few years now and always thought him rather cute. I'm not even sure if Lucy's Stamps still exist anymore, but thought he was perfect for the Hocus Pocus theme.
I'm entering him in this week's challenge at www.tagalongchallenge.blogspot.co.uk
Happy crafting!
Monday, 7 October 2013
Winged Teddy
We've been enjoying a lovely long weekend here in Sydney, with beautiful weather as an added bonus, so what better time to play with all things paper.
It started on Saturday morning with my "Quick & Easy Christmas Cards" class at Alice in Paperland, with a repeat of the class in the afternoon. We were using Kaisercraft's "St. Nicholas" 6x6 pad of papers and die-cuts with just a bit of stamping added from the "Christmas Sentiments" clear stamps.
On Sunday I wanted to finish making some more 'cheap & cheerful' goodies for the Spring Fair I've booked a stand at in a couple of weekends time but before I started, I'd first hem some pants belonging to my brother. Out came my mini sewing machine and what should have been a half hour (at the most) job, turned into a 2 hour job as the stitches kept looping on the back and I just couldn't work out why - grrrrrr !!! Not the best sewing I've ever done, but hopefully they'll be ok as they are casual outdoor type pants.
Today I've been playing with a couple of ATC's, as that is the theme at Stampotique this week.
The background is Distress Inks in red and yellow with a touch of black, stamped with ink splodges from "French Foliage" (SU). "Teddy" from Stampotique was coloured with Distress Markers before being fussy cut. His wings are a freebie stamp from "Craft Stamper" magazine a few months back, and "Haunting" is from Graphic 45 - a bit of a mixed bag! The top corner was distressed and torn just for added interest.
On landing, "Teddy" discovered the big black spider in it's web. The spider, web and quote all come from Graphic 45. The background has been done the same way as before. (apologies for the blurriness)
I hope where-ever you are in the world, you've had an enjoyable weekend and thanks for visiting. All comments are appreciated (nice ones only) and if you comment as 'anonymous' please leave your name so I know who you are!
I'm entering "Teddy" in this weeks Stampotique ATC challenge.
Oh, and to update you, my back is feeling much better now, fingers & toes crossed it will stay that way!
Happy crafting!
It started on Saturday morning with my "Quick & Easy Christmas Cards" class at Alice in Paperland, with a repeat of the class in the afternoon. We were using Kaisercraft's "St. Nicholas" 6x6 pad of papers and die-cuts with just a bit of stamping added from the "Christmas Sentiments" clear stamps.
On Sunday I wanted to finish making some more 'cheap & cheerful' goodies for the Spring Fair I've booked a stand at in a couple of weekends time but before I started, I'd first hem some pants belonging to my brother. Out came my mini sewing machine and what should have been a half hour (at the most) job, turned into a 2 hour job as the stitches kept looping on the back and I just couldn't work out why - grrrrrr !!! Not the best sewing I've ever done, but hopefully they'll be ok as they are casual outdoor type pants.
Today I've been playing with a couple of ATC's, as that is the theme at Stampotique this week.
The background is Distress Inks in red and yellow with a touch of black, stamped with ink splodges from "French Foliage" (SU). "Teddy" from Stampotique was coloured with Distress Markers before being fussy cut. His wings are a freebie stamp from "Craft Stamper" magazine a few months back, and "Haunting" is from Graphic 45 - a bit of a mixed bag! The top corner was distressed and torn just for added interest.
On landing, "Teddy" discovered the big black spider in it's web. The spider, web and quote all come from Graphic 45. The background has been done the same way as before. (apologies for the blurriness)
I hope where-ever you are in the world, you've had an enjoyable weekend and thanks for visiting. All comments are appreciated (nice ones only) and if you comment as 'anonymous' please leave your name so I know who you are!
I'm entering "Teddy" in this weeks Stampotique ATC challenge.
Oh, and to update you, my back is feeling much better now, fingers & toes crossed it will stay that way!
Happy crafting!
Sunday, 29 September 2013
Just a little journal Splatting!
Today I've been playing .... and working. Since I'm still being ultra cautious when walking around the house, no sudden moves etc, I thought I'd have a bit of a play. But first I needed to finish prepping next Saturday's "Quick & Easy Christmas Cards" class at Alice in Paperland. So I've finished cutting cardstock, typed up the instructions, added photos and printed it all off. Since this is mostly done sitting down, I've also been keeping the heat up, trying to relax those injured muscles. Definitely feeling better but scared I'll make another 'nothing in particular' move and I'll be in pain again.
Anyhow ....... after sitting for a while I really needed to gently stretch those muscles so I got out my art journal and distress paints and inks and got playing. Because I don't want to get ink over things, I generally set up on my kitchen bench and just make sure the stove is covered, and so I stood up for a while playing.
First up I decided to "splat" (should that have 1 or 2 't' s?), a technique I saw recently on Scrap It TV using distress paints. I also discovered it also works very well with distress stains.
This was FUN!!! Some splats turn out BIG some turn out small, but it was lots of FUN!!!
The exclamation marks make this splat come to life, hee hee. I splatted with distress paints first, then dried them off before splatting with distress stains. To splat with paints, add a couple of drops of water to the sponge head and then SPLAT, easy peasy! The stains really don't need water adding as they are already fairly liquid.
I then turned the page and just 'painted' the two pages - I'm not sure if these pages will get used for anything else, but they are colourful and I like them just as they are. I also added a little water spray, just for fun, hence the blobs on the 'stain' page - yes, they are meant to be there!
Hopefully, I'll get to work in the morning, but I'll be making sure there will be no heavy lifting involved.
Happy crafting!
Anyhow ....... after sitting for a while I really needed to gently stretch those muscles so I got out my art journal and distress paints and inks and got playing. Because I don't want to get ink over things, I generally set up on my kitchen bench and just make sure the stove is covered, and so I stood up for a while playing.
First up I decided to "splat" (should that have 1 or 2 't' s?), a technique I saw recently on Scrap It TV using distress paints. I also discovered it also works very well with distress stains.
This was FUN!!! Some splats turn out BIG some turn out small, but it was lots of FUN!!!
The exclamation marks make this splat come to life, hee hee. I splatted with distress paints first, then dried them off before splatting with distress stains. To splat with paints, add a couple of drops of water to the sponge head and then SPLAT, easy peasy! The stains really don't need water adding as they are already fairly liquid.
I then turned the page and just 'painted' the two pages - I'm not sure if these pages will get used for anything else, but they are colourful and I like them just as they are. I also added a little water spray, just for fun, hence the blobs on the 'stain' page - yes, they are meant to be there!
Hopefully, I'll get to work in the morning, but I'll be making sure there will be no heavy lifting involved.
Happy crafting!
Saturday, 28 September 2013
Fofe & Mela
Hi there, here I am again, still nursing a sore back and feel like I'm walking on eggshells, but my back is a lot less painful today. Lots of heat, rest and not doing too much. Oh, and the house-elves, slaves and other family members are being super helpful with chores. Thanks guys - love you all.
Over at Stampotique this week, the theme is 'washi tape' so I thought I'd play along.
First up I made the background from washi tape and blended various distress inks together. Next I stamped Fofe and coloured him using distress markers, fussy cut around him and popped him onto dimensionals for added depth.
A length of washi tape folded together and looped forms a 'ribbon' for the tag.
I quite liked the idea of playing with the washi tape, so I made a second tag, this time with Mela as the centre of attention.
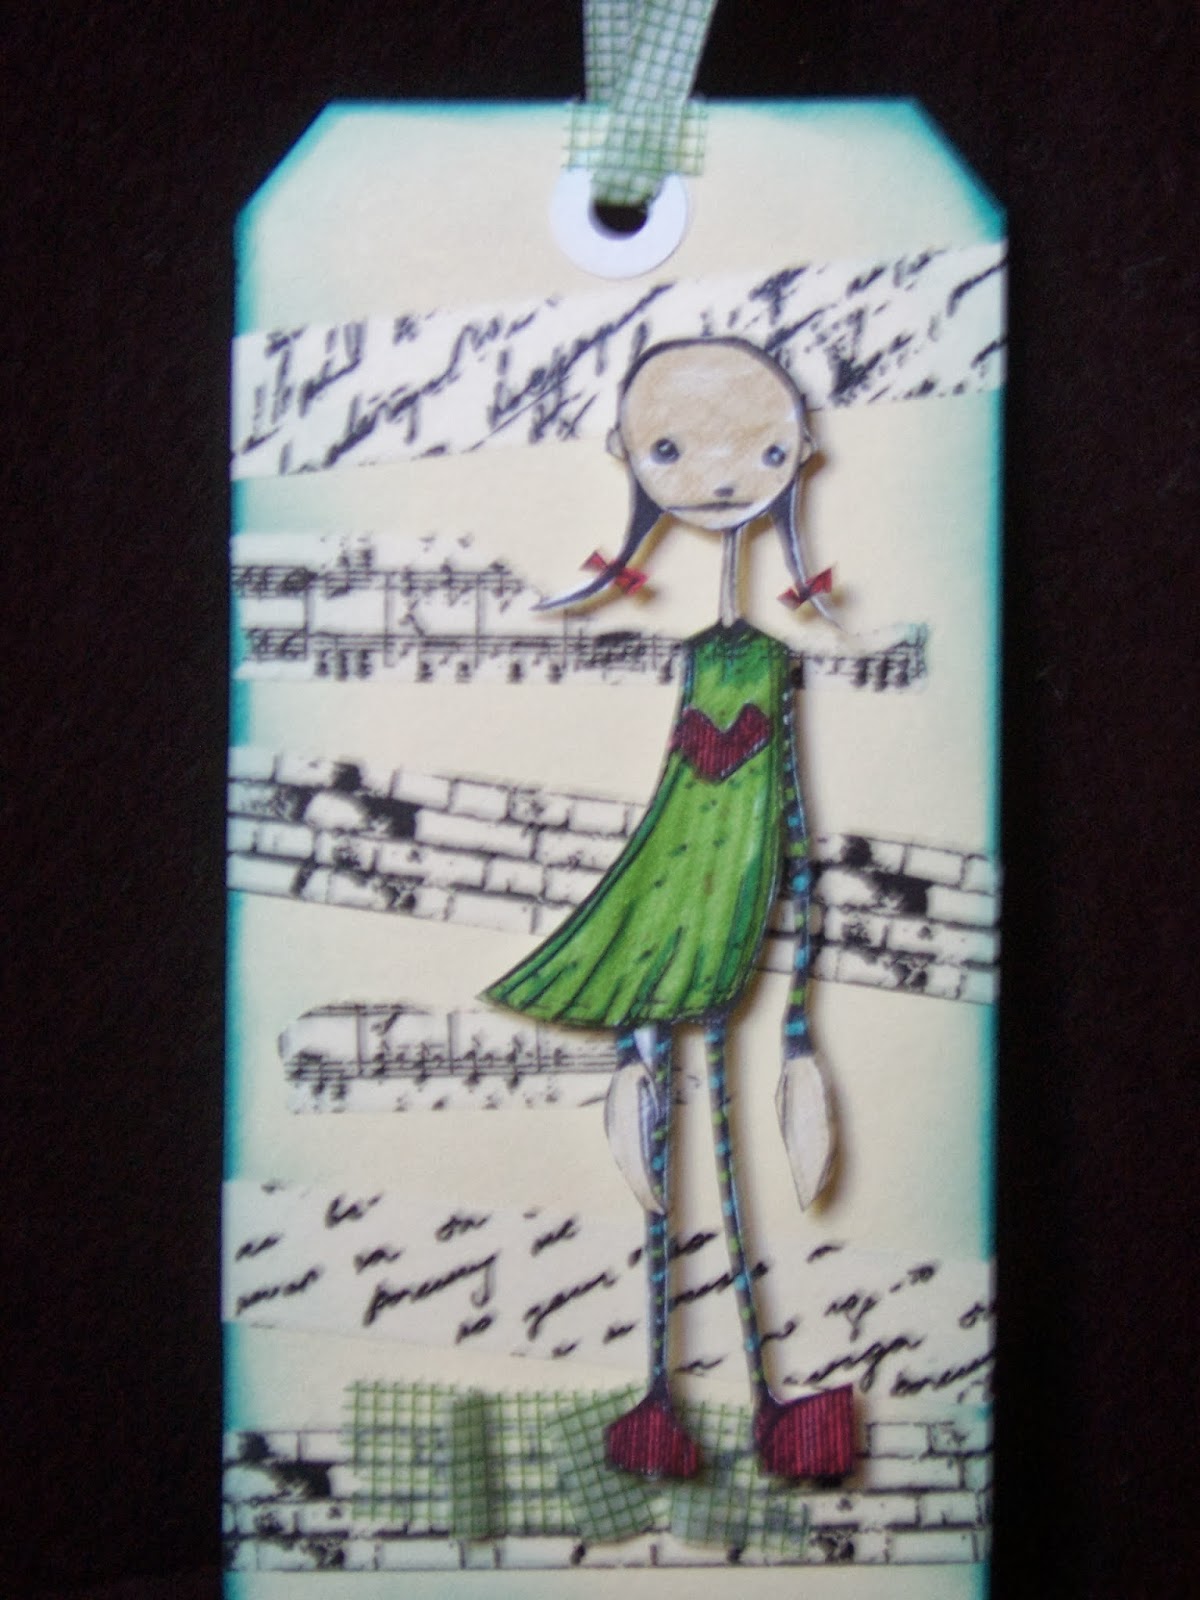
This time after laying the washi tape at different angles, I went around the edges of the tag with distress ink "peacock feathers". I didn't want too much background colour as I felt she could blend in too easily.
A piece of green washi tape grounds her, and it was also used to make the 'ribbon'.
This was a fun challenge to use washi tape, as quite often I just don't seem to know what to do with it. Many thanks to the DT members for their inspiration.
Fofe is my entry in this week's challenge at Stampotique
Happy crafting!
Over at Stampotique this week, the theme is 'washi tape' so I thought I'd play along.
First up I made the background from washi tape and blended various distress inks together. Next I stamped Fofe and coloured him using distress markers, fussy cut around him and popped him onto dimensionals for added depth.
A length of washi tape folded together and looped forms a 'ribbon' for the tag.
I quite liked the idea of playing with the washi tape, so I made a second tag, this time with Mela as the centre of attention.
This time after laying the washi tape at different angles, I went around the edges of the tag with distress ink "peacock feathers". I didn't want too much background colour as I felt she could blend in too easily.
A piece of green washi tape grounds her, and it was also used to make the 'ribbon'.
This was a fun challenge to use washi tape, as quite often I just don't seem to know what to do with it. Many thanks to the DT members for their inspiration.
Fofe is my entry in this week's challenge at Stampotique
Happy crafting!
Subscribe to:
Posts (Atom)