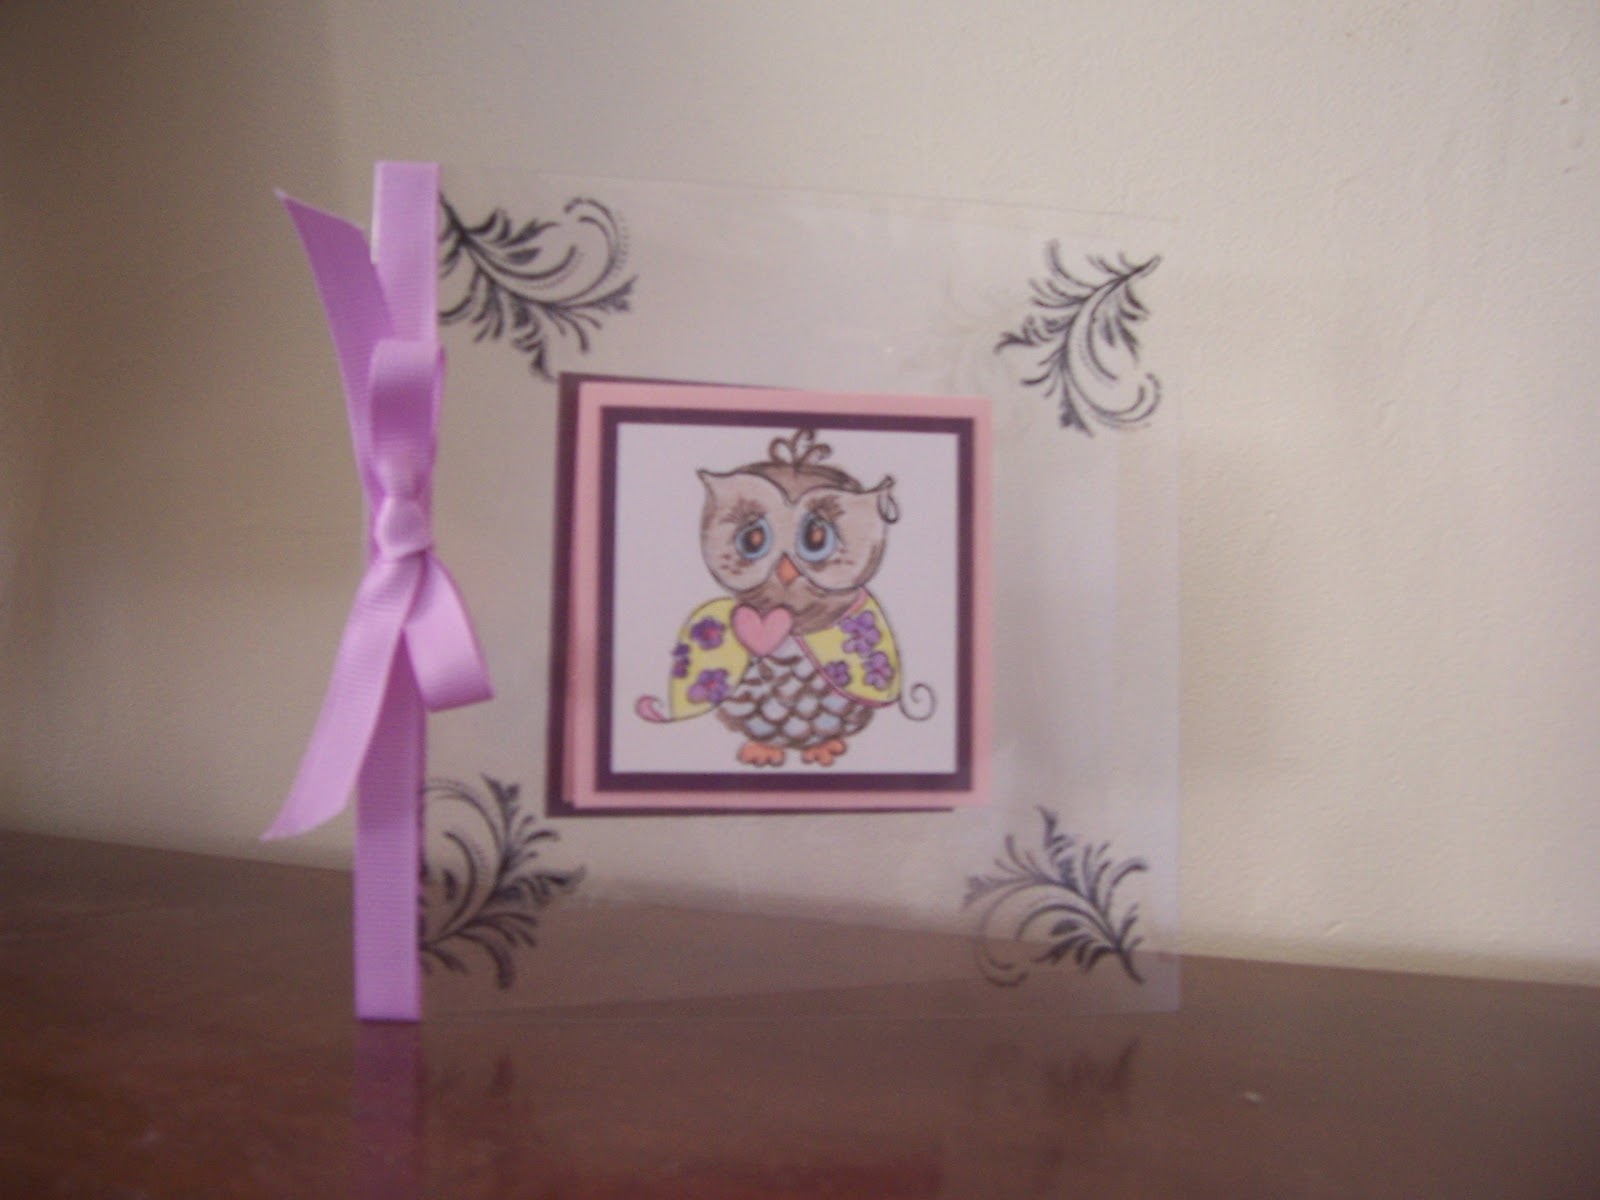
I'm back to show you the second of the acetate cards we made in class this morning at Alice in Paperland. This card was really easy to put together, just as long as you have a grid to line the initial stamped image up. I find Stampin' Up!'s grid paper so useful in lining up all sorts of things and by the time it needs throwing out, there's not much blank left to see, front or back!
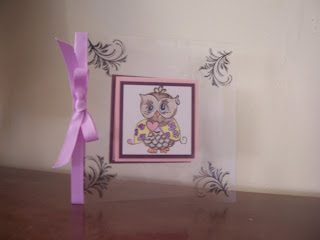
I started with a piece of acetate 11" x 5 1/2" to make a square card. Using black StazOn I stamped each of the corners, then put it aside while I stamped up the owl and coloured it with water-colour pencils and a water brush. This piece is adhered to the centre front of the acetate. The second mat is adhered to the inside of the acetate, taking care to line it up, which hides the double-sided tape. Adhere the third mat in the same way. On the inside back of the acetate, adhere another card the same size as the third mat, lining it up exactly behind the front mats. You now have somewhere to write your greeting. Finish with a fourth mat, adhering it to the back of the acetate, again this hides the double-sided tape, and add some ribbon as embellishment. The idea for this card came from
www.splitcoaststampers.com so have a look.
I feel I've repeated myself so many times in the instructions, but it really is easy. Unfortunately I wasn't able to take a photo of the inside as being acetate, it was very hard to keep open.
Have a crafty day!
I'm always so impressed with acetate cards Helen and yours is no exception! Vicky x
ReplyDelete